Creating Leadsets
Overview
Leadset creation involves adding and organizing the list of contacts that will be used in a call center campaign.
A leadset defines the group of leads (customers or prospects) that agents will call during the campaign.
During this process, you can upload lead data, review the information for accuracy, and assign the leadset to a specific campaign.
Properly configured leadsets ensure that calls are made to the right audience, improve connection rates, and help in tracking campaign performance effectively.
Steps for creating Leadsets
This section has information on the Leadsets. You can also Create Leadset . 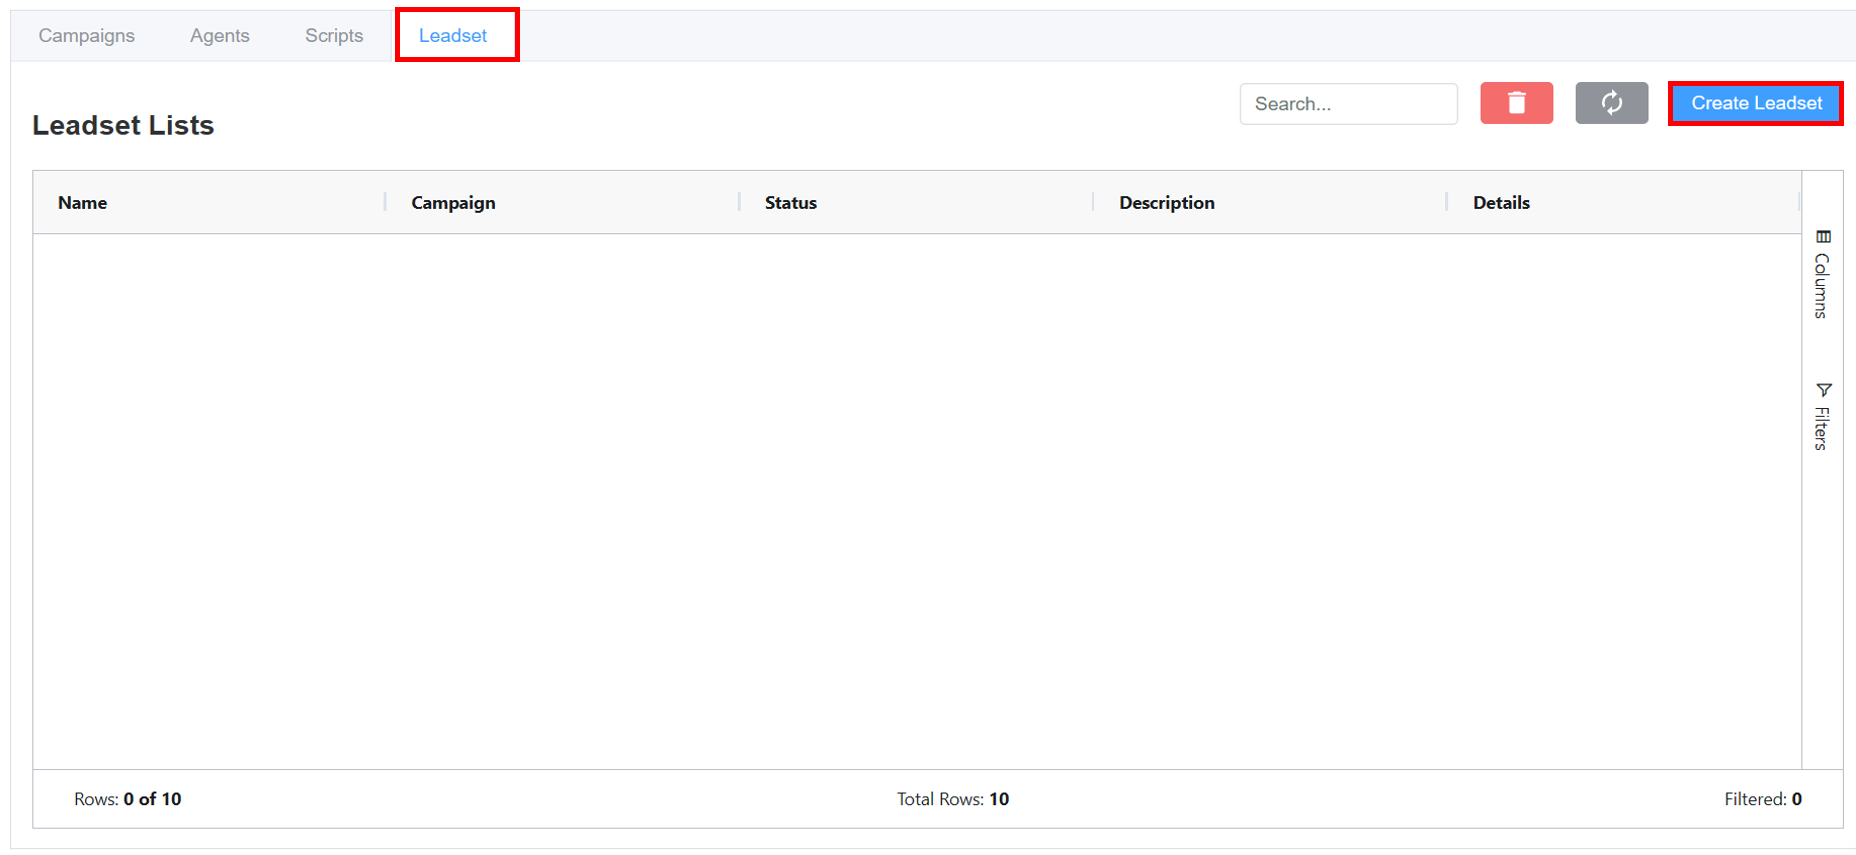
-
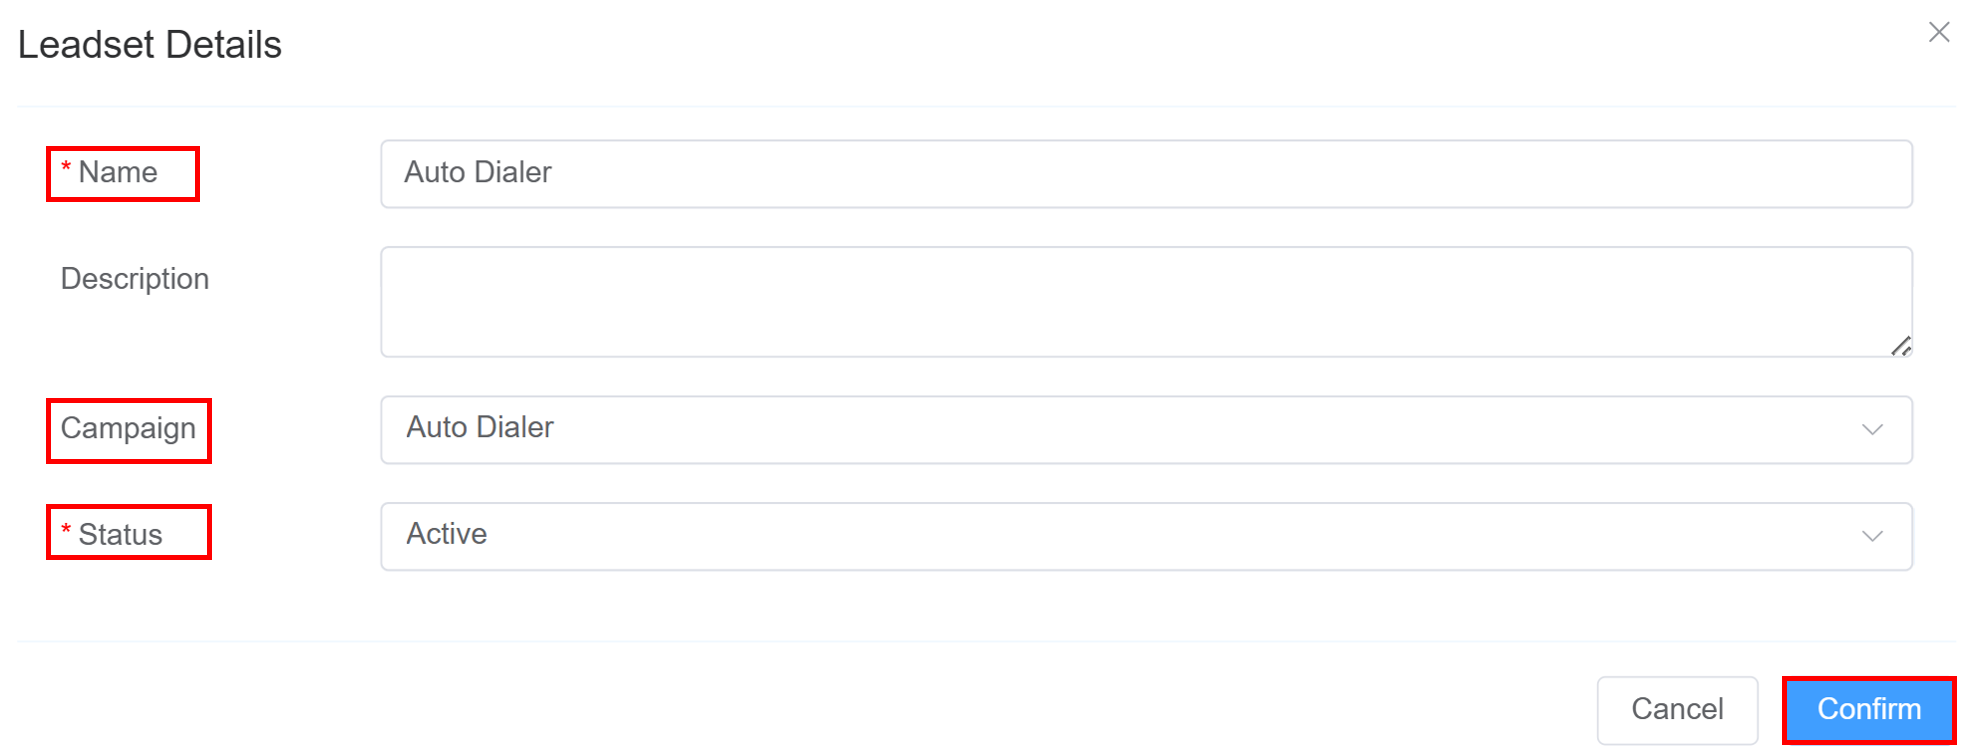
A new window will appear, prompting you to enter the required information:
- Enter the leadset
Name. - Pen-down any required
Description. - Select the
Campaignfrom the drop-down for which you wish to associate the leadset. - State: Configure the leadset’s operational status by setting it to either Active (available for assignment and dialing) or Inactive (disabled or paused).
- Click on
Confirmto create the leadset.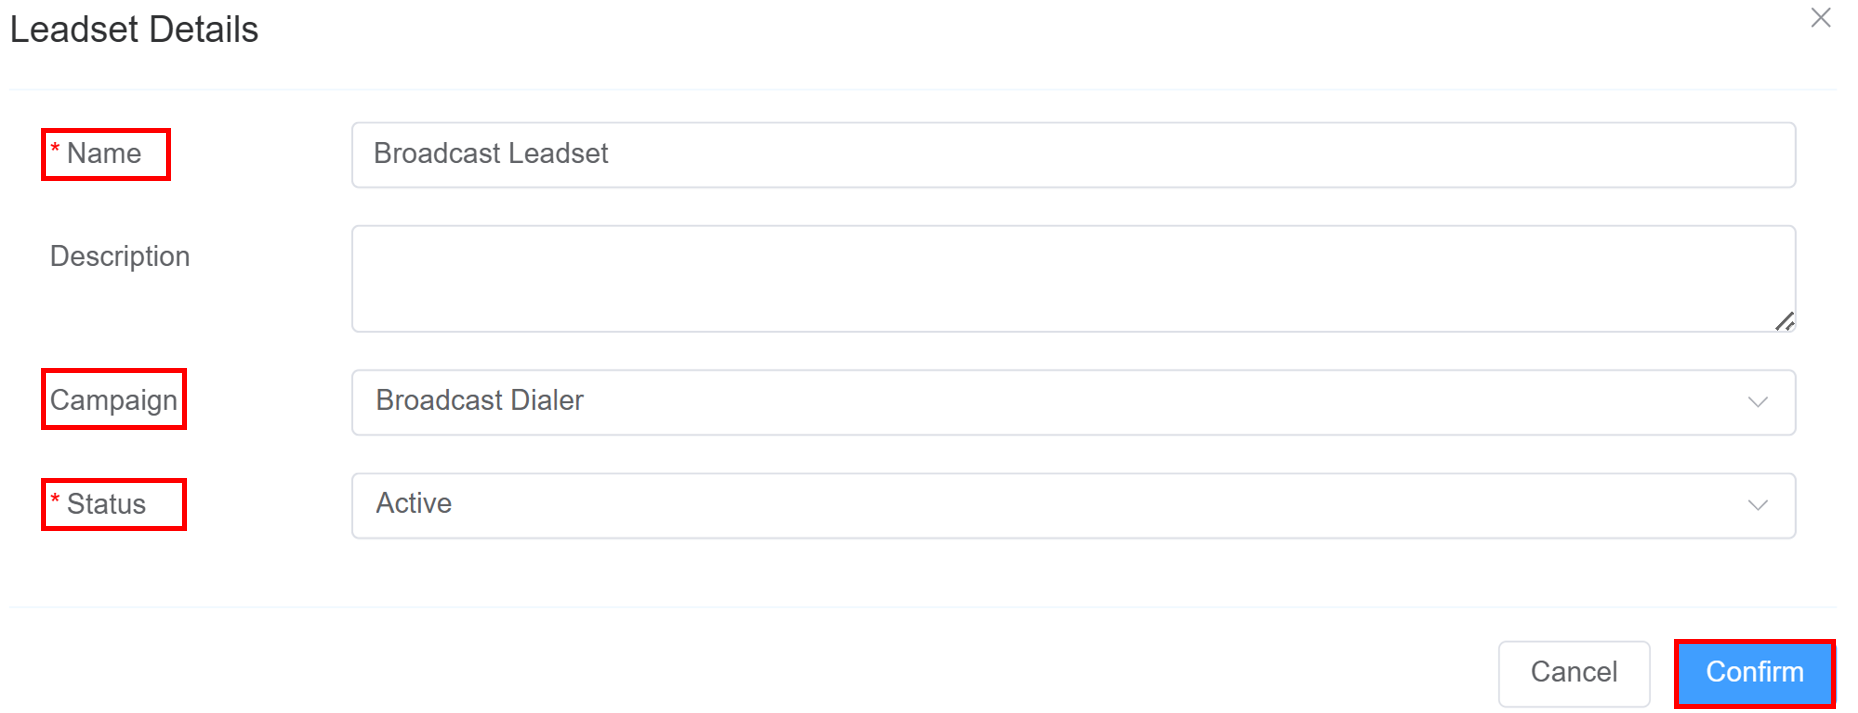

- Enter the leadset
-
Click on
See Morein theDetailscolumn.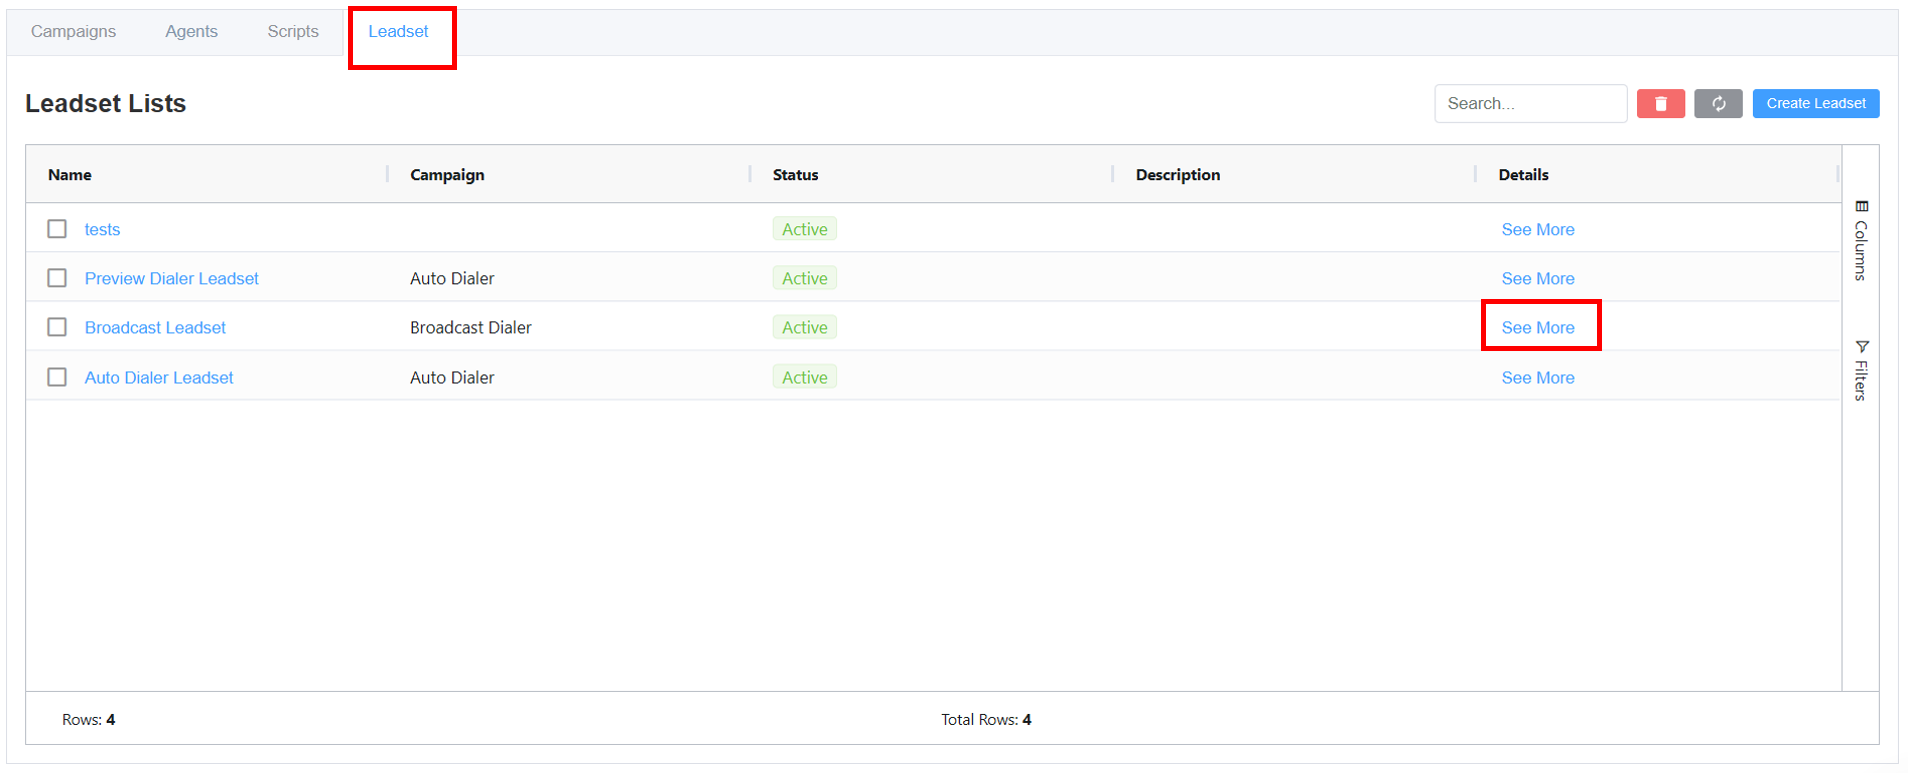
-
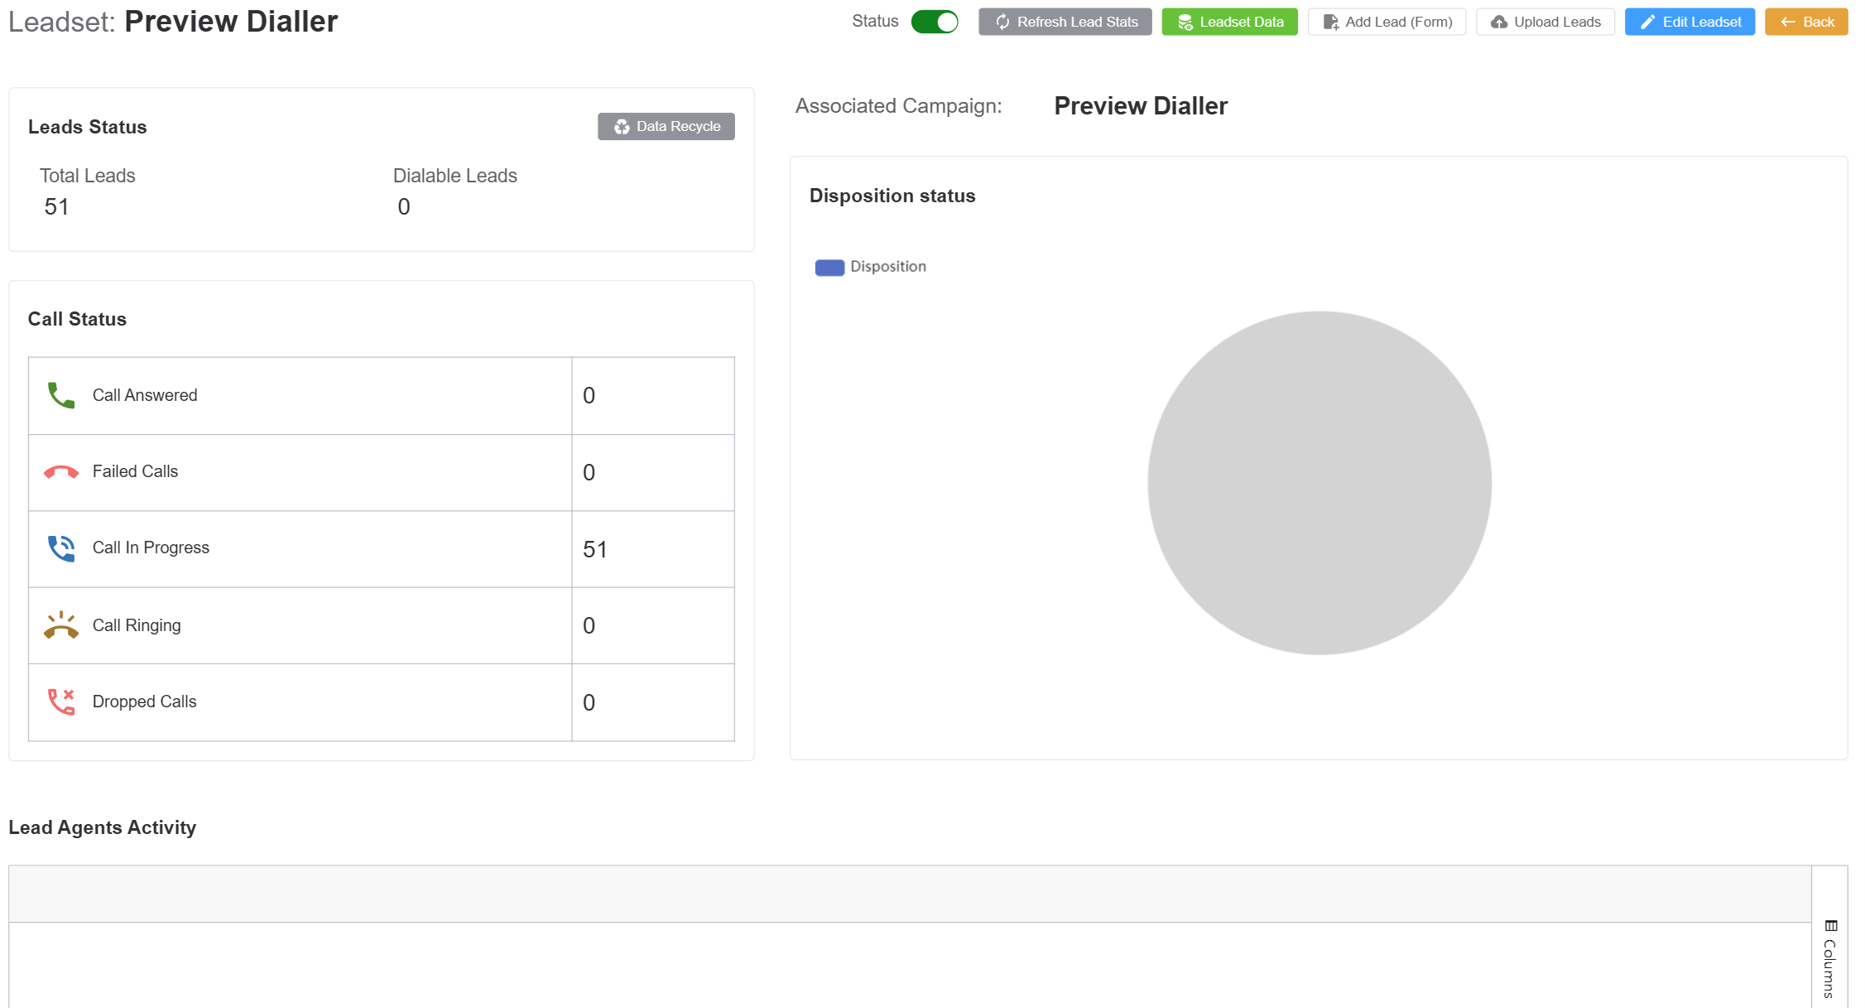
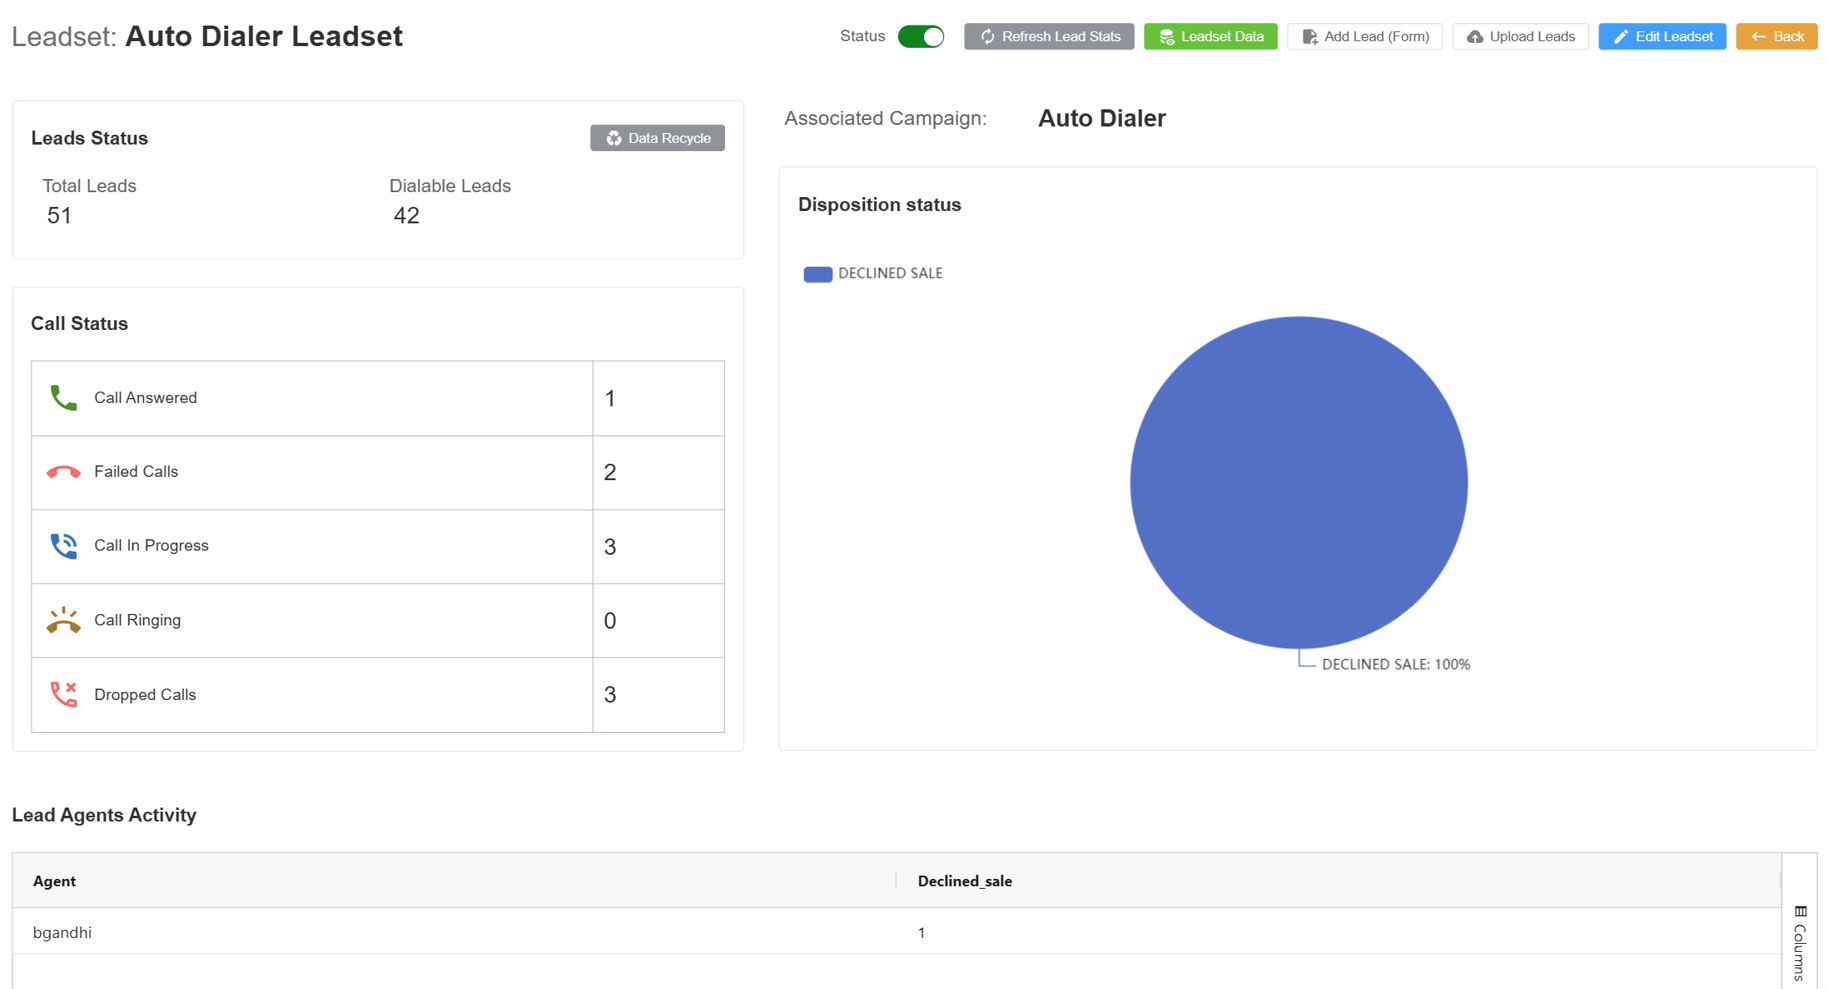
A Leadset Dashboard monitoring window will appear which displays the metrics of the leadset.(Note: This image does not represent the dashboard after it has fully loaded).
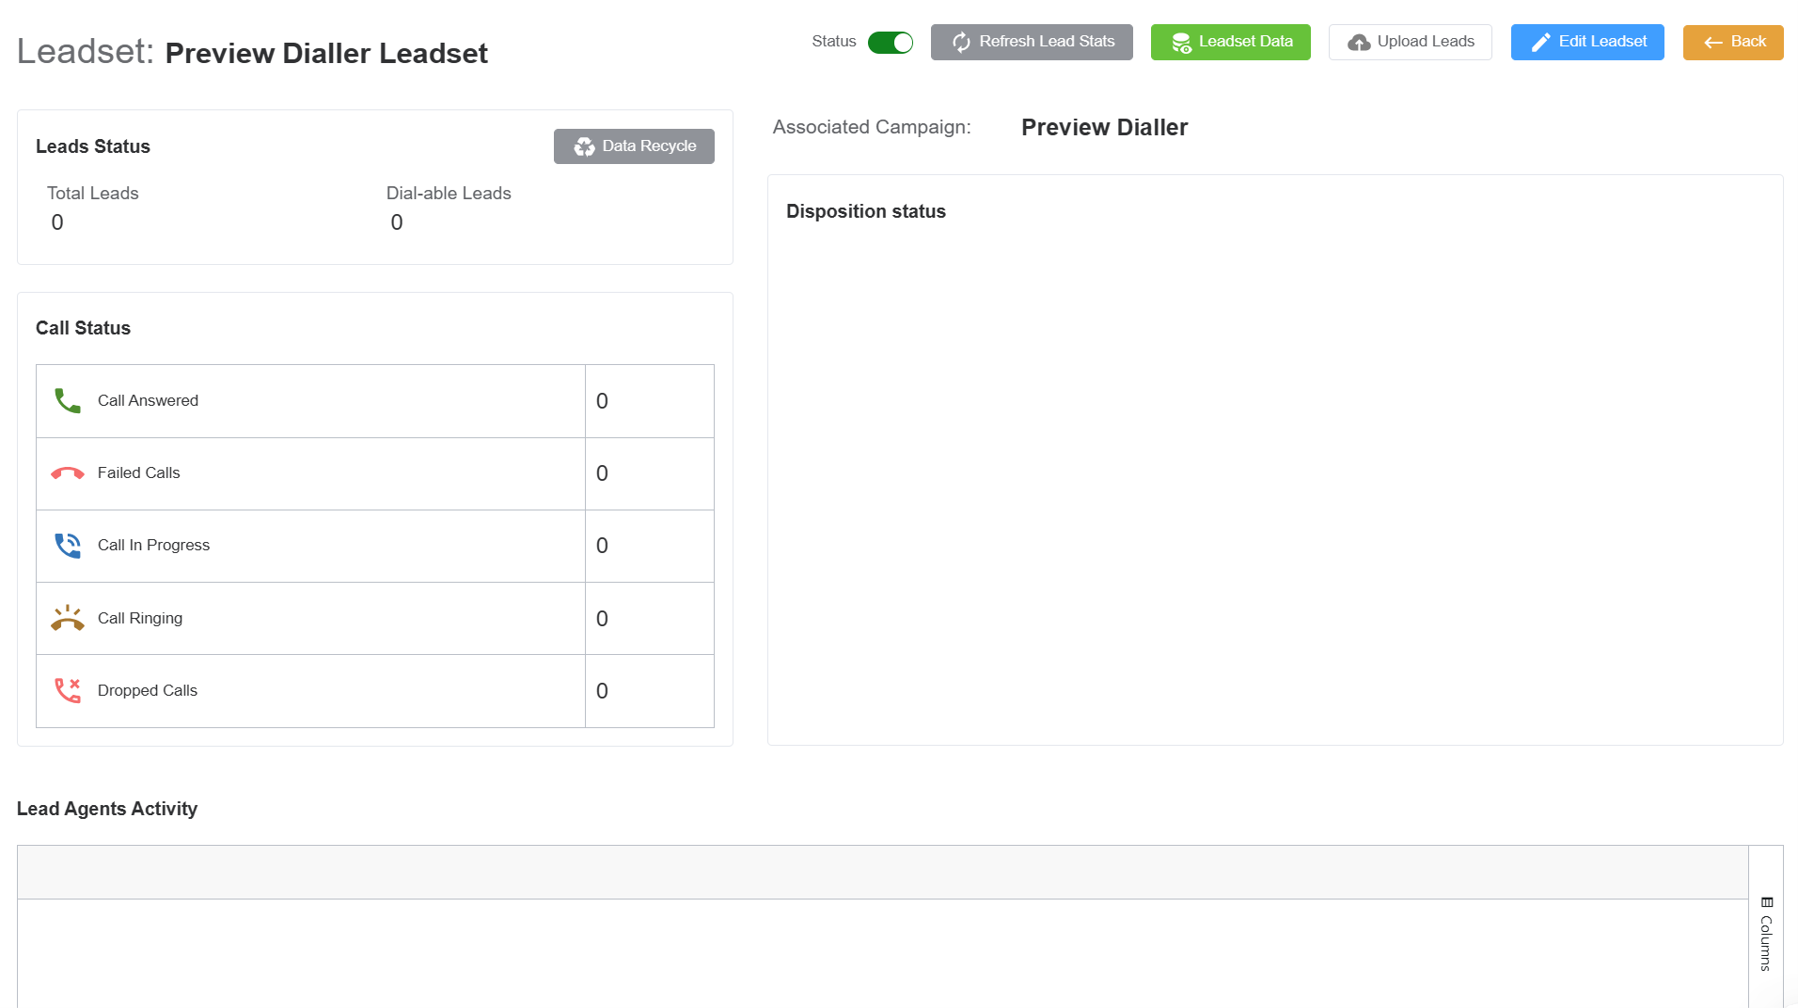
-
Description of the fields in the stats window:
Status: Set the leadset toActiveorInactivestate.- Refresh your leadset parameters using
Refresh Lead Stats. - Click on
Leadset Datato view the leadset data. - Click on
Upload Leadsto upload the leadset data. - Upload your data via
File,URLor by entering theText.
Uploading a File
- Drag and Drop a file or click to upload the
.csv.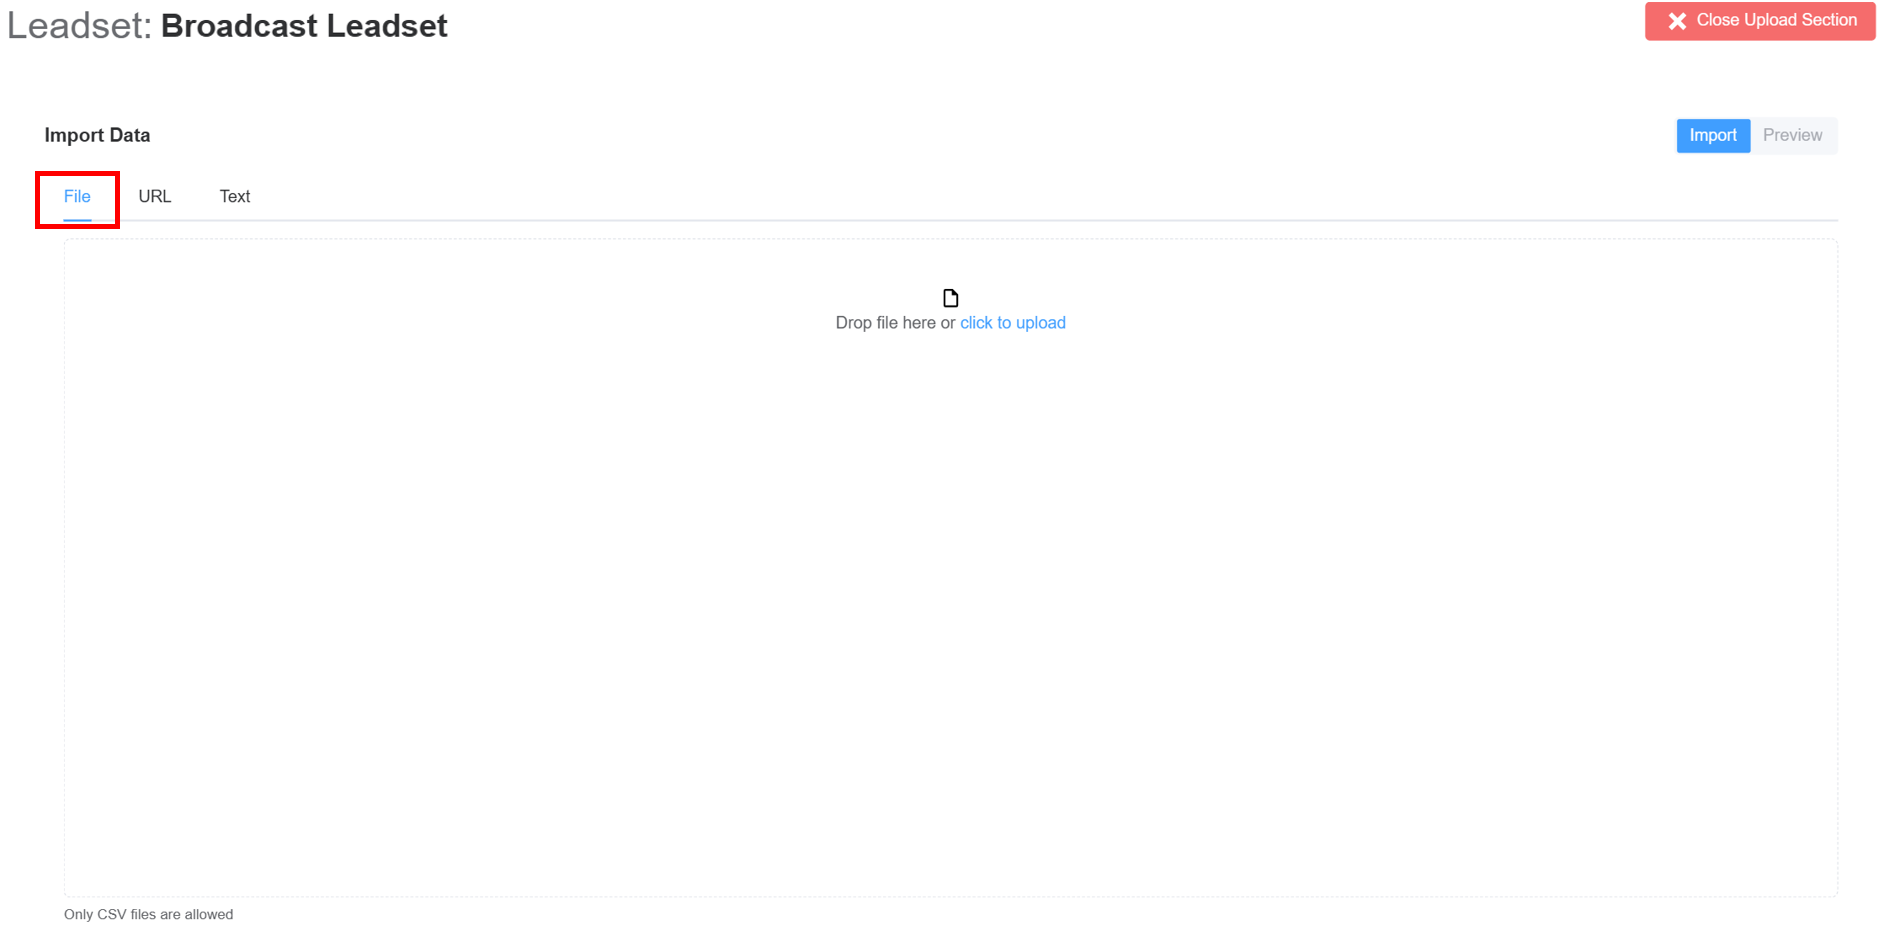
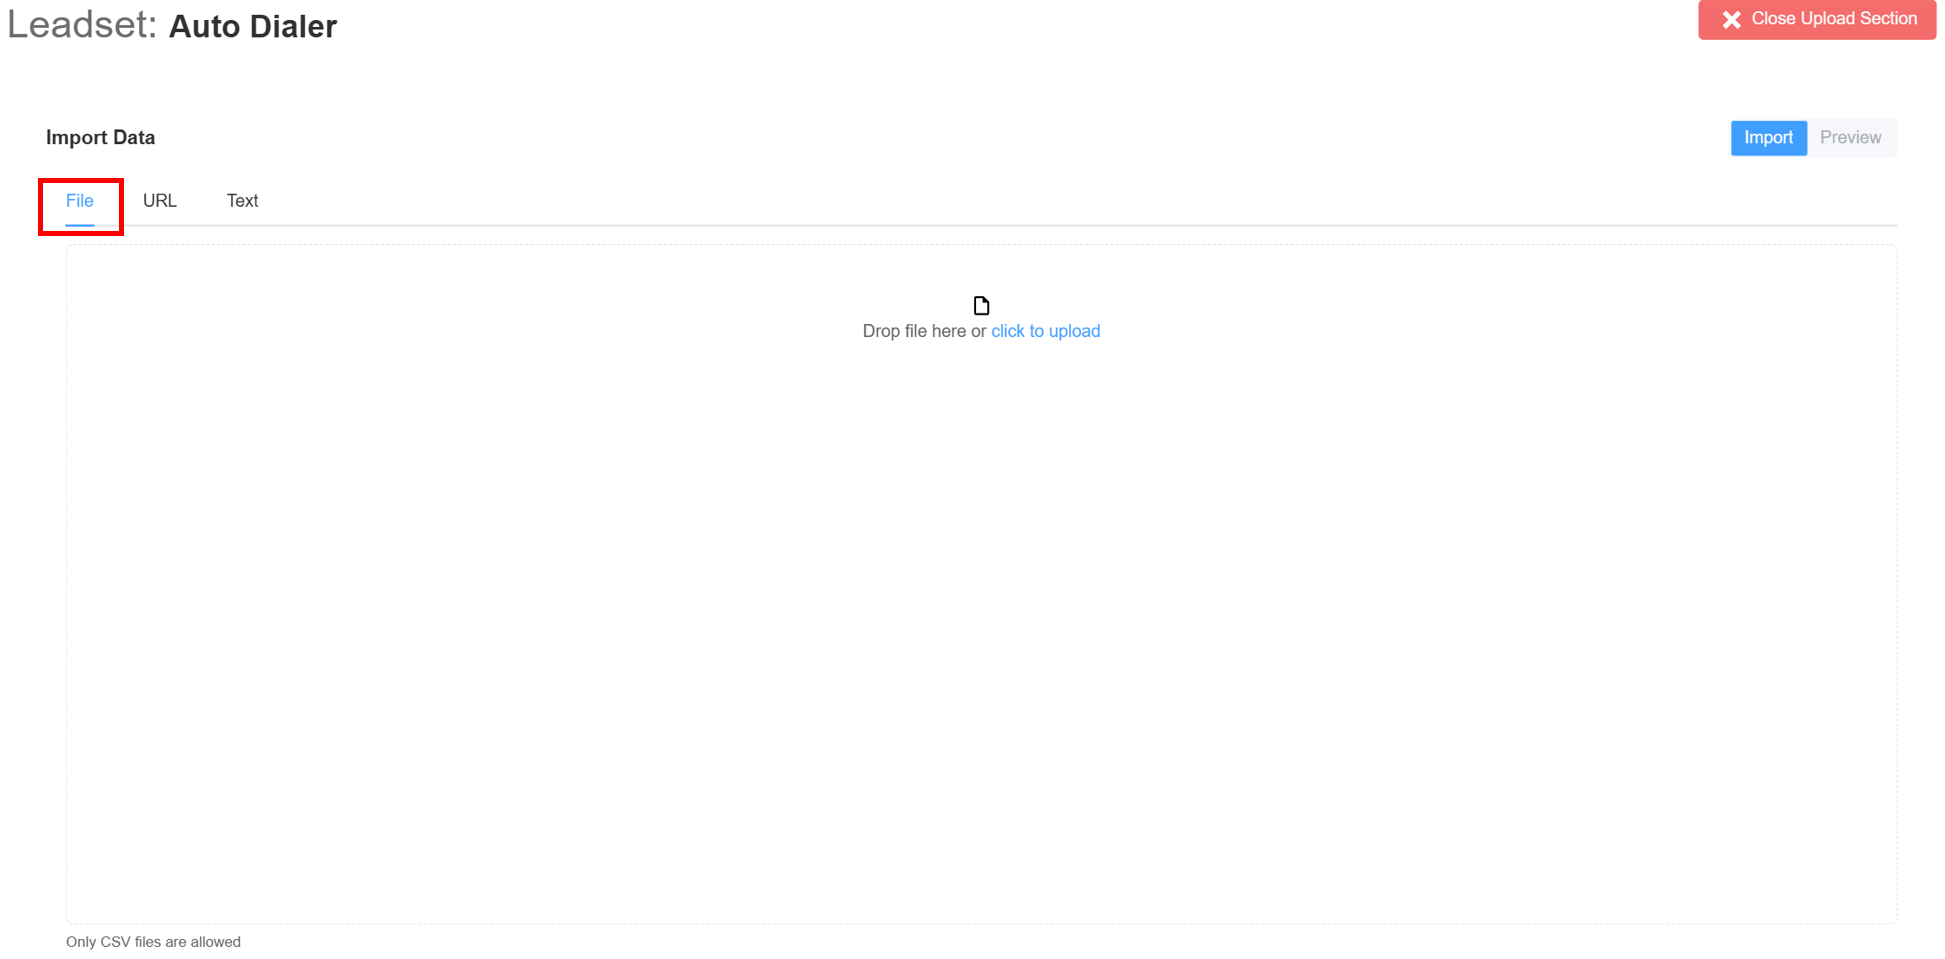
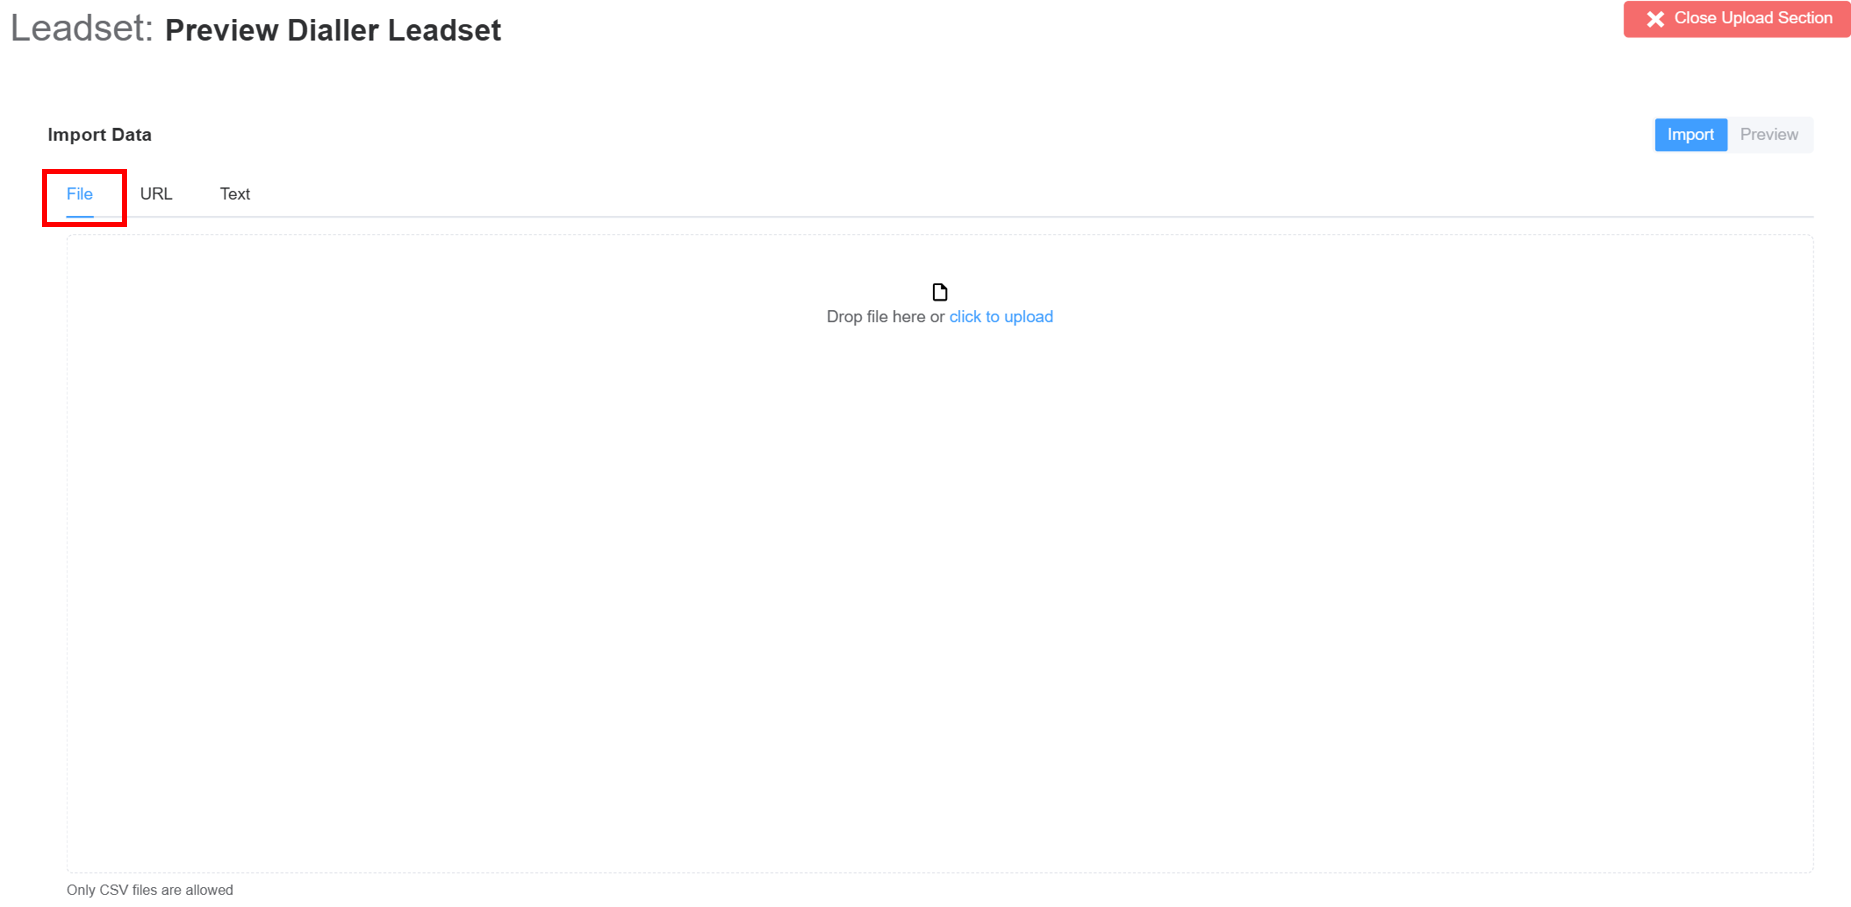
- A new window will open where two actions must be completed to create the leadset.
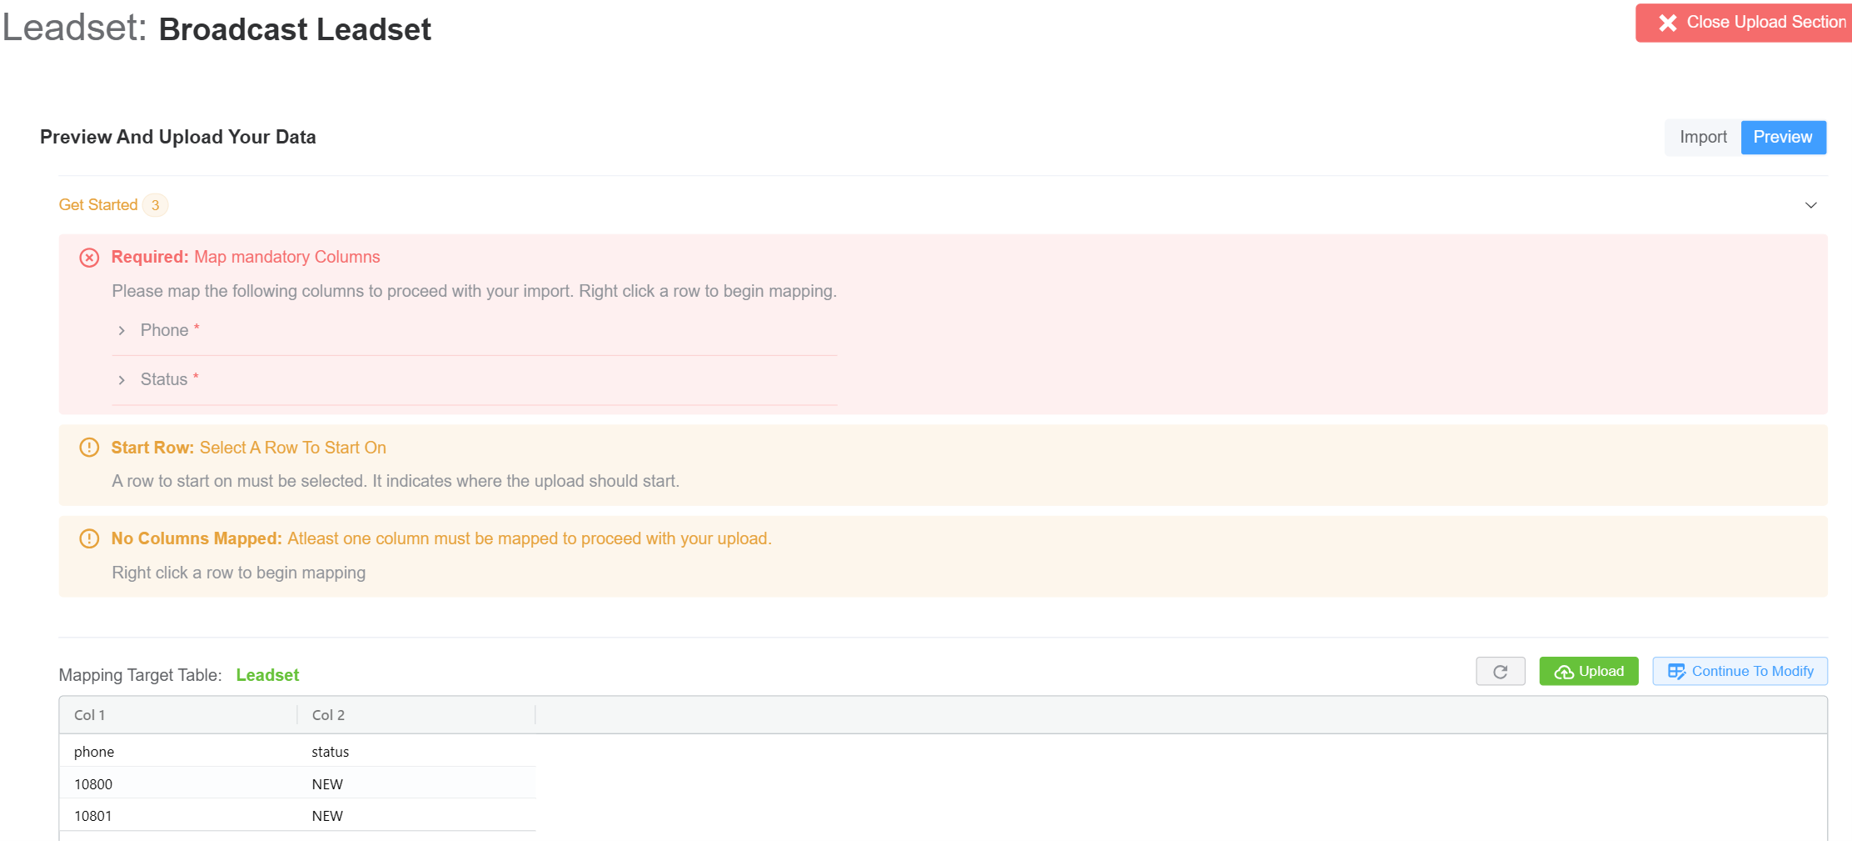
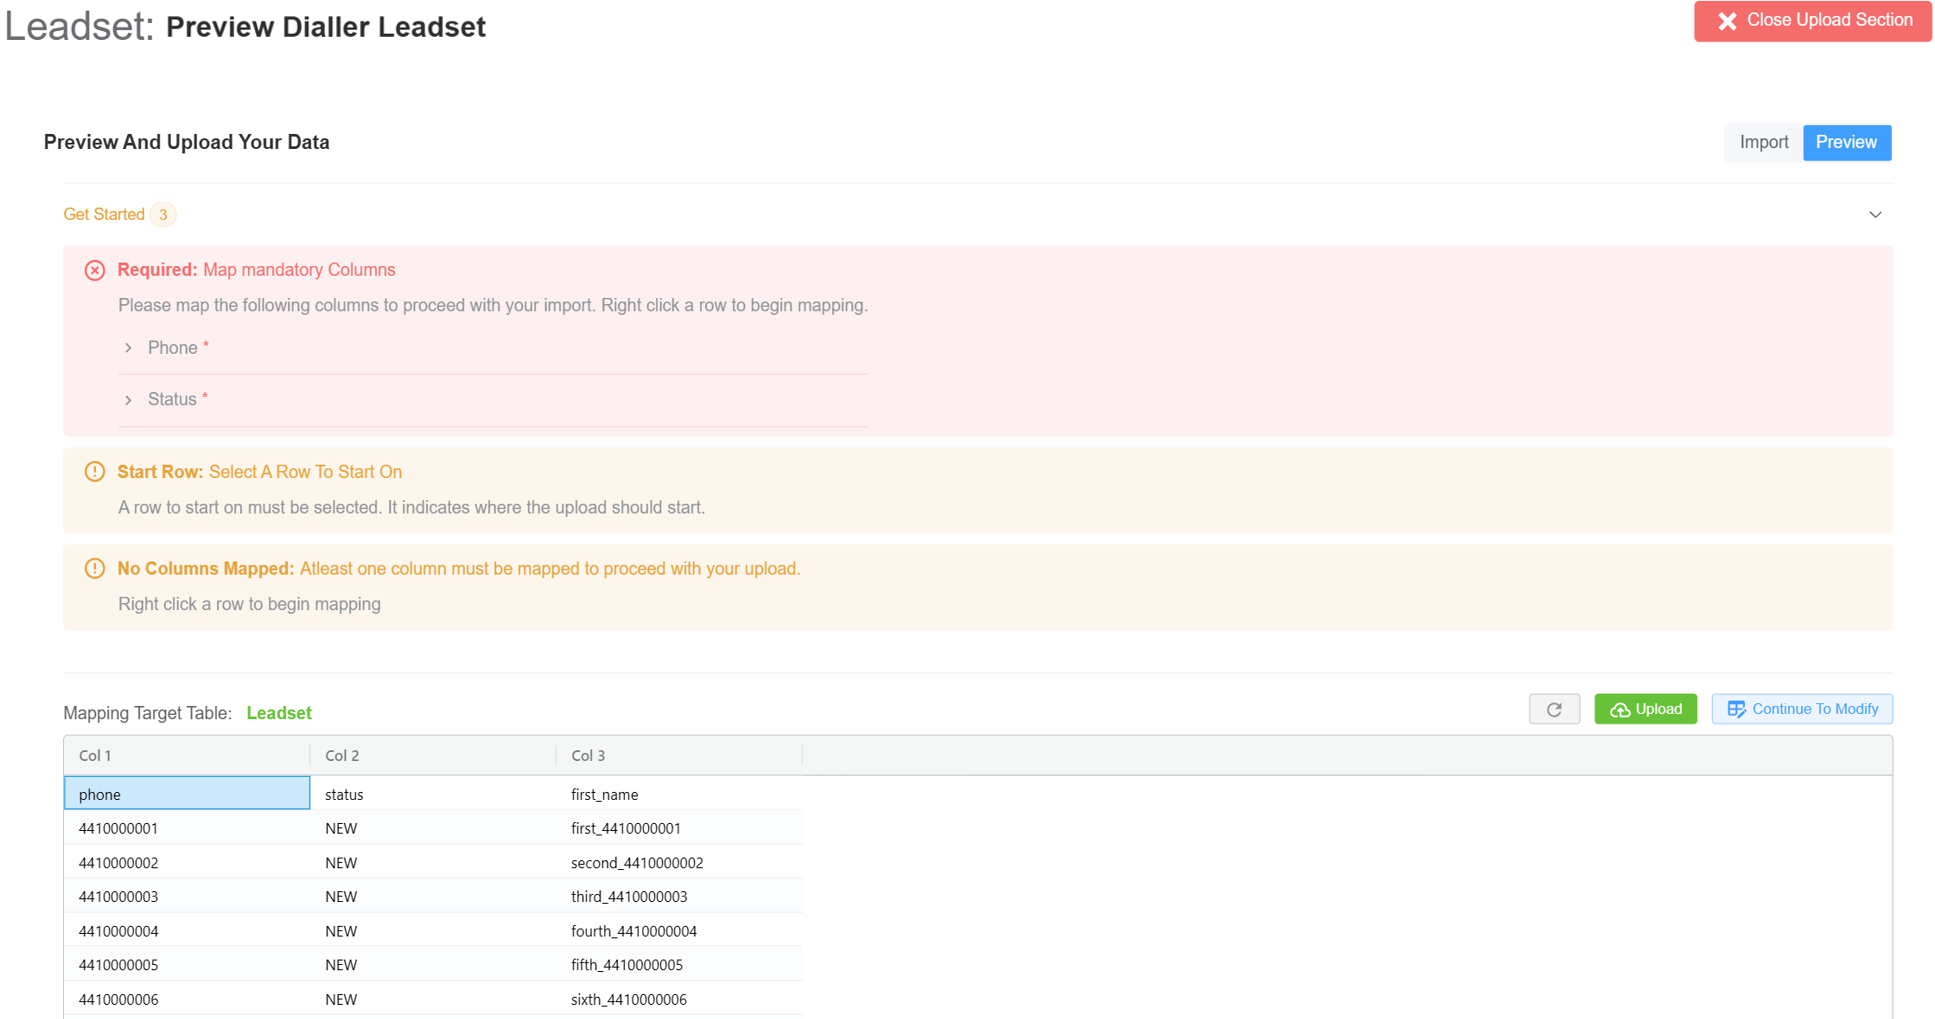
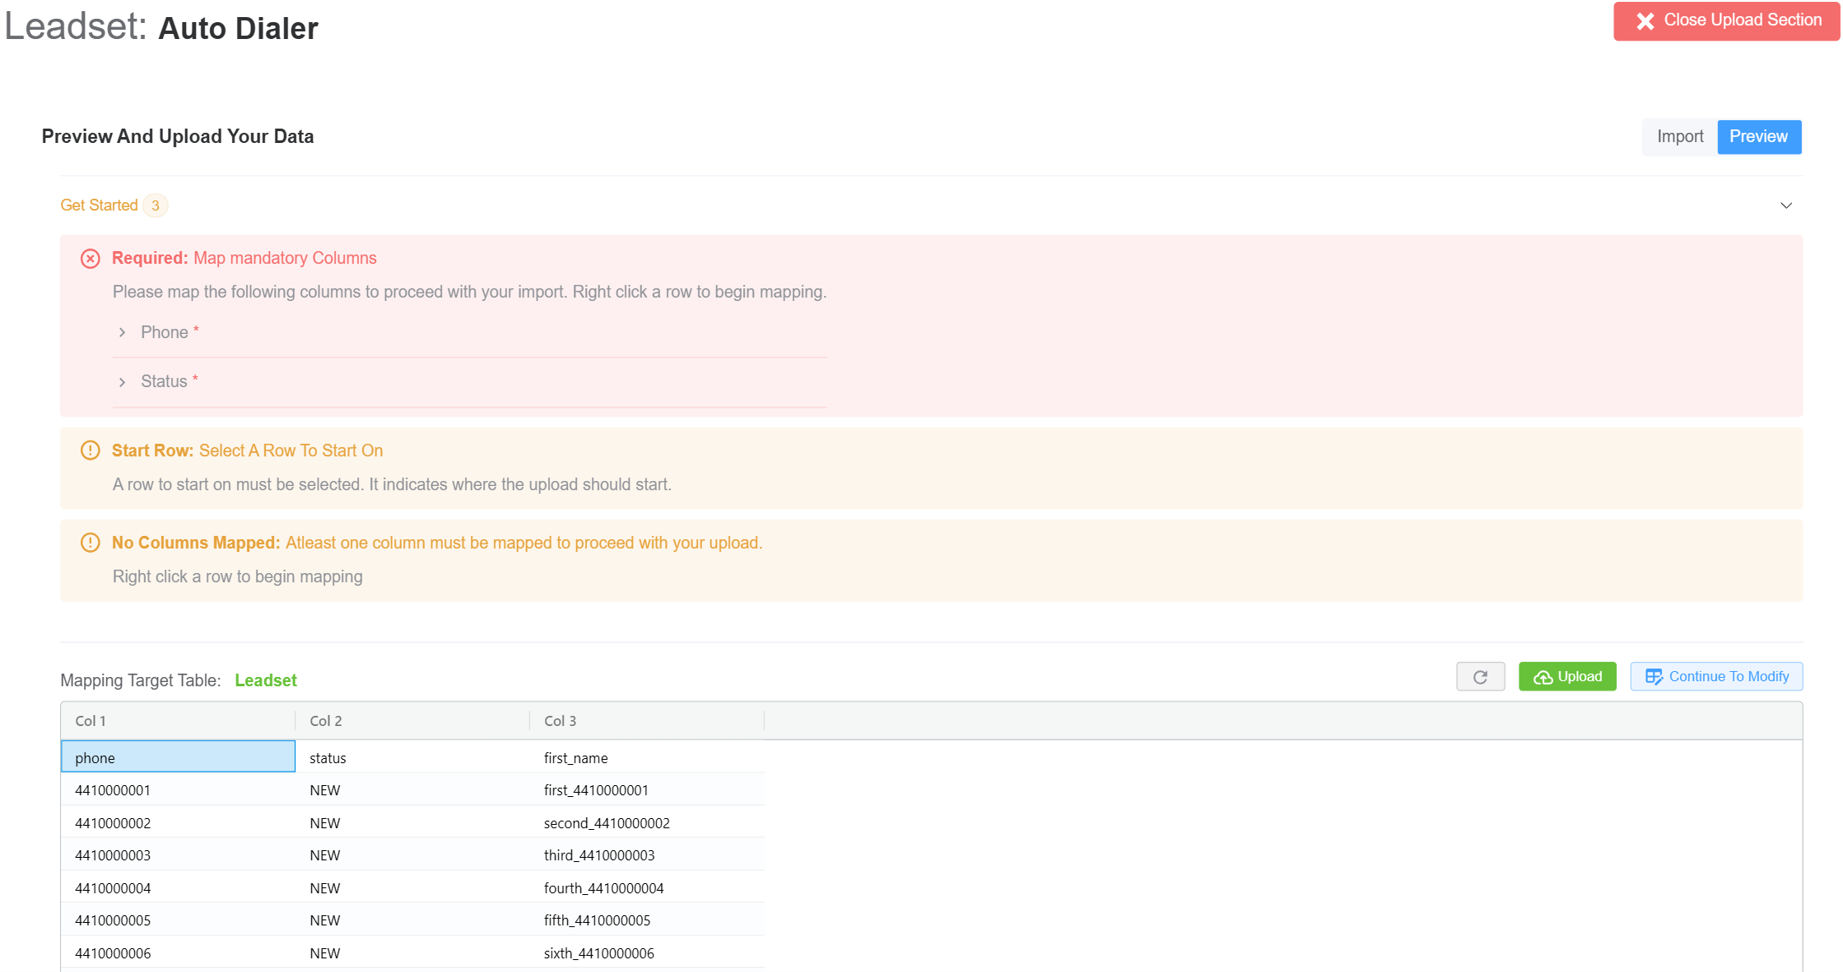
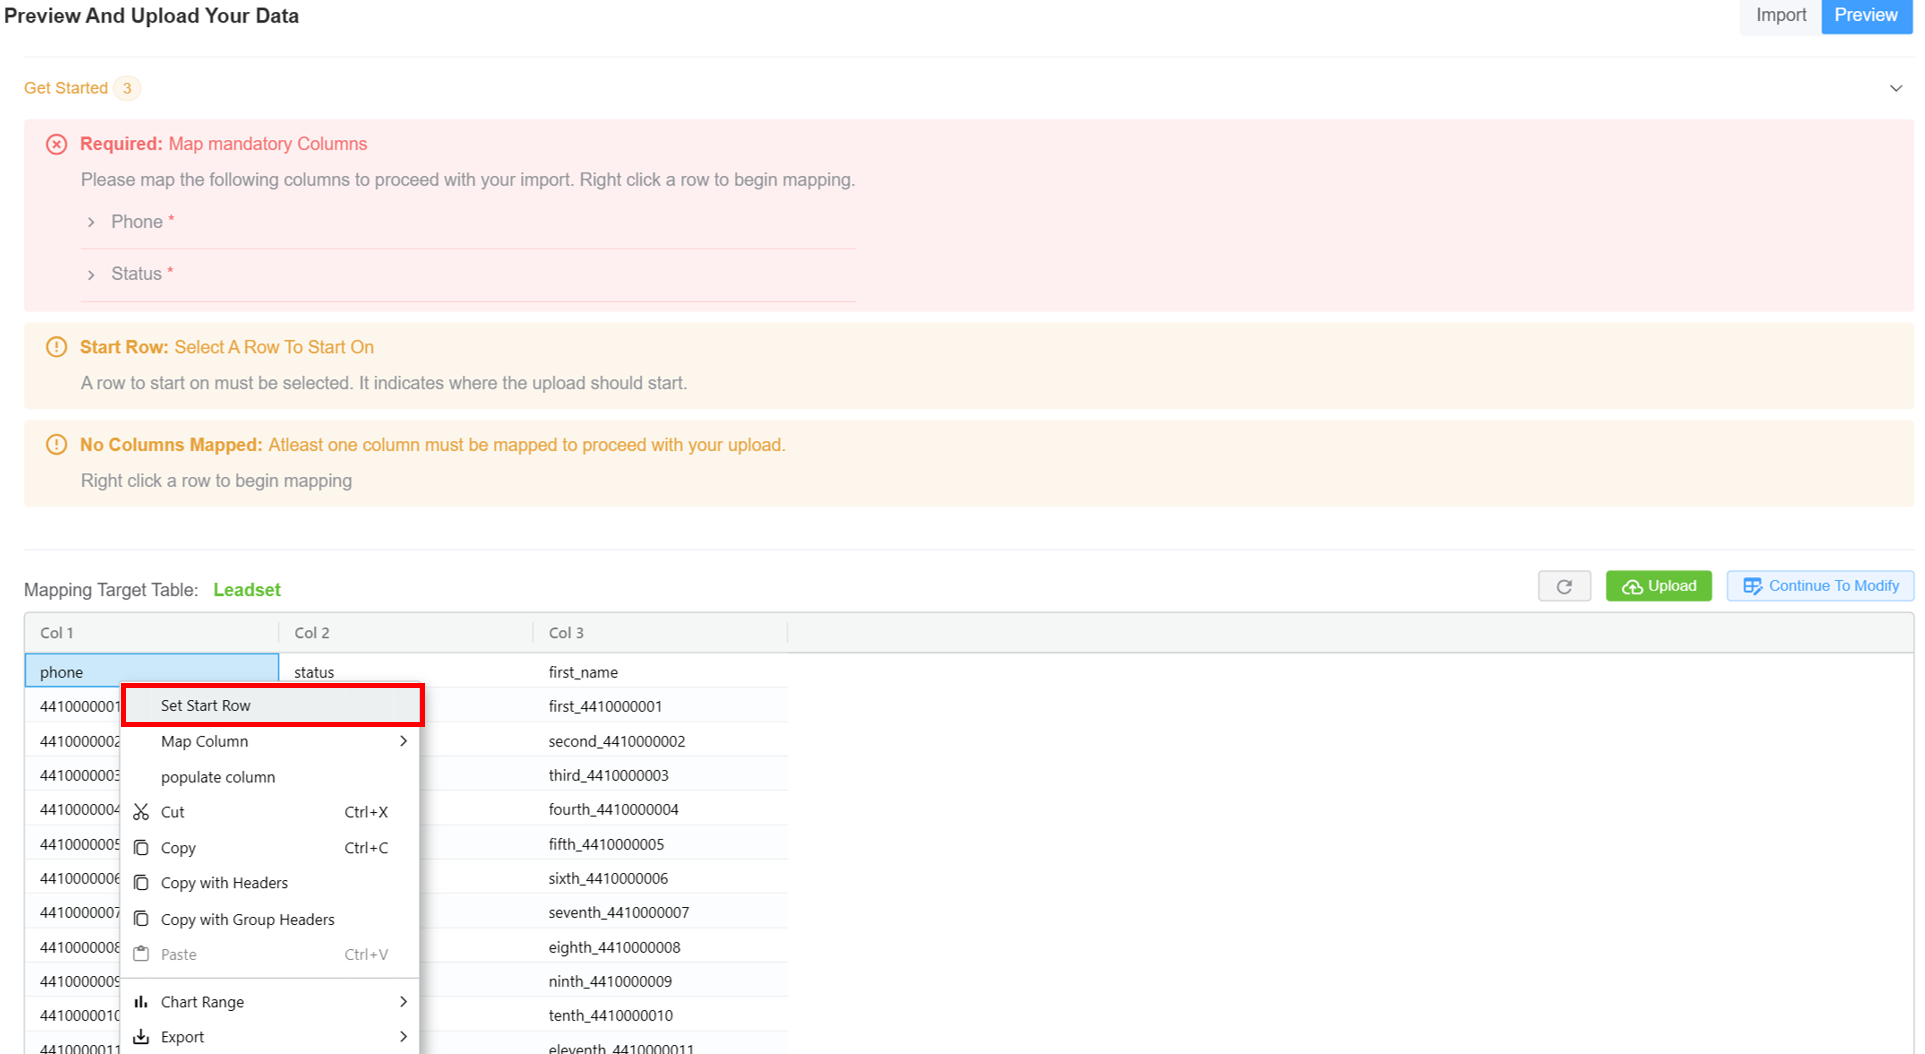
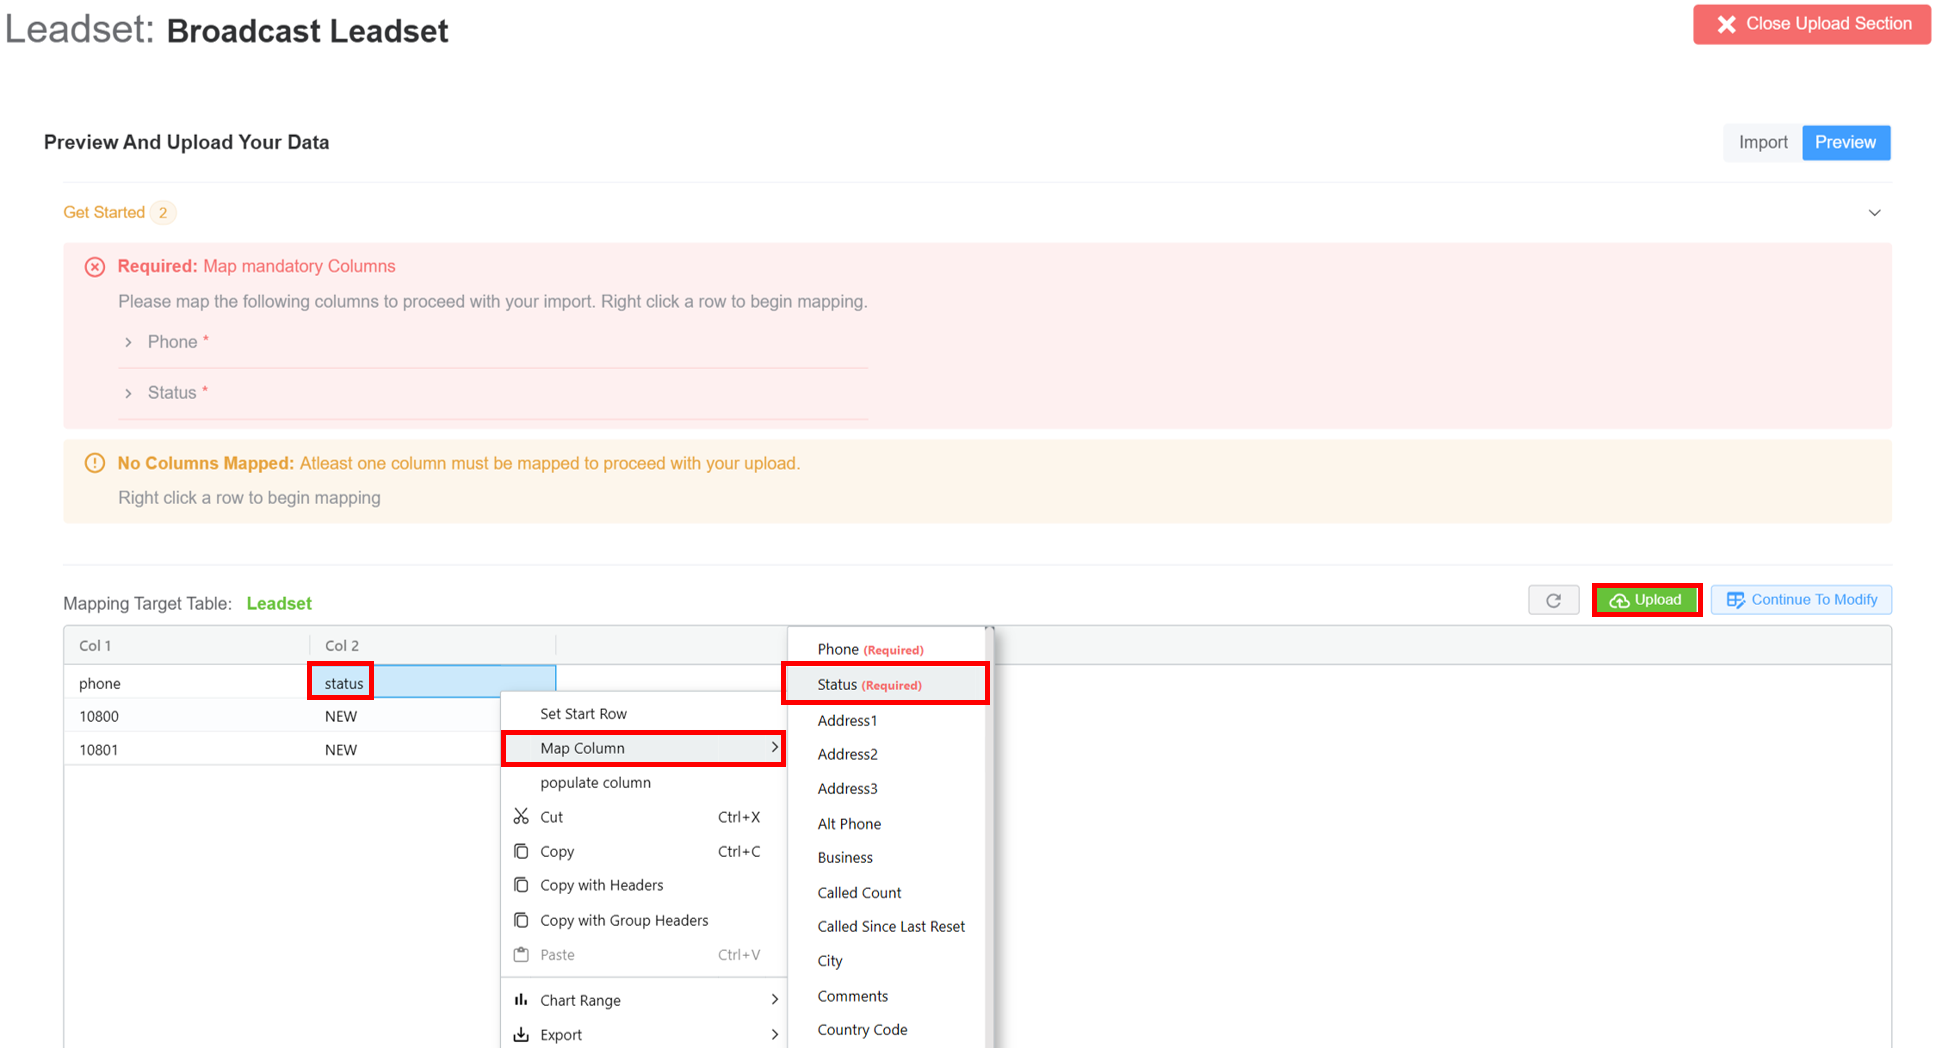
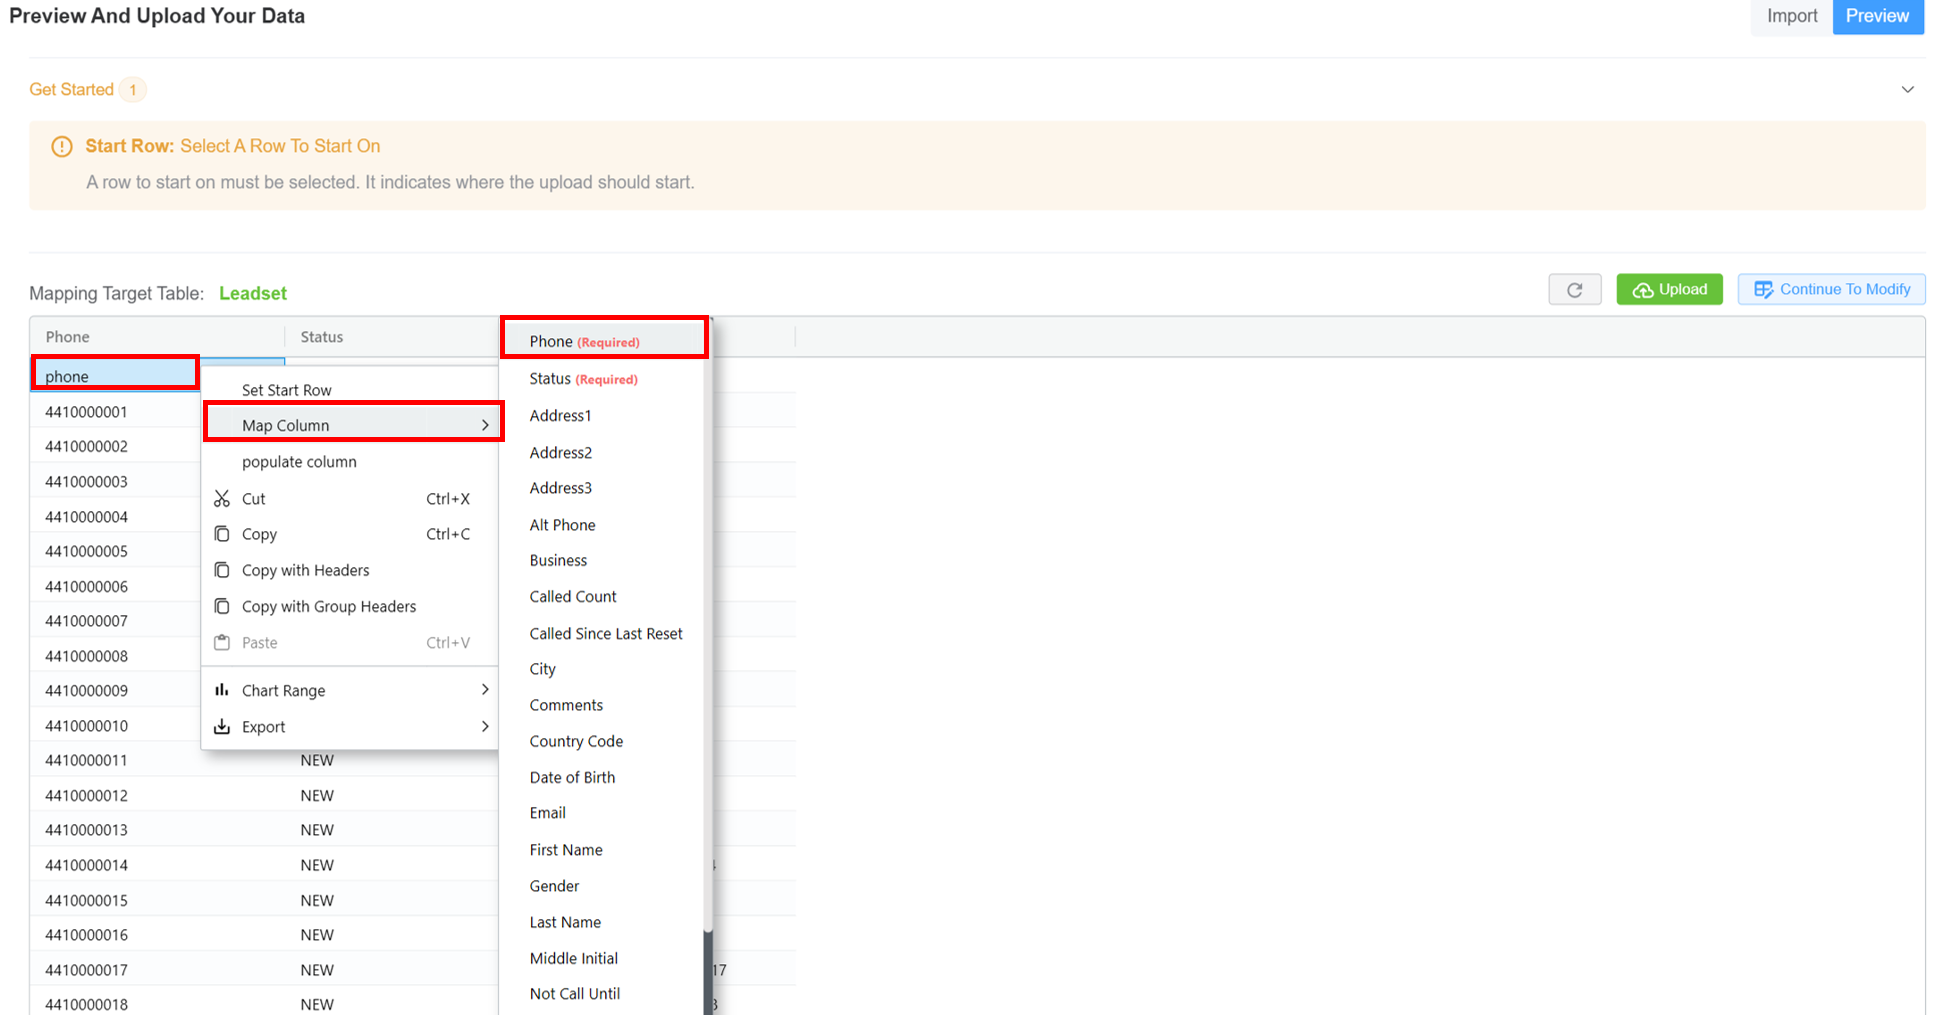
Set row: To indicate where the upload should start.Right-clickon the row to want to start the uploading and click onSet Start Row.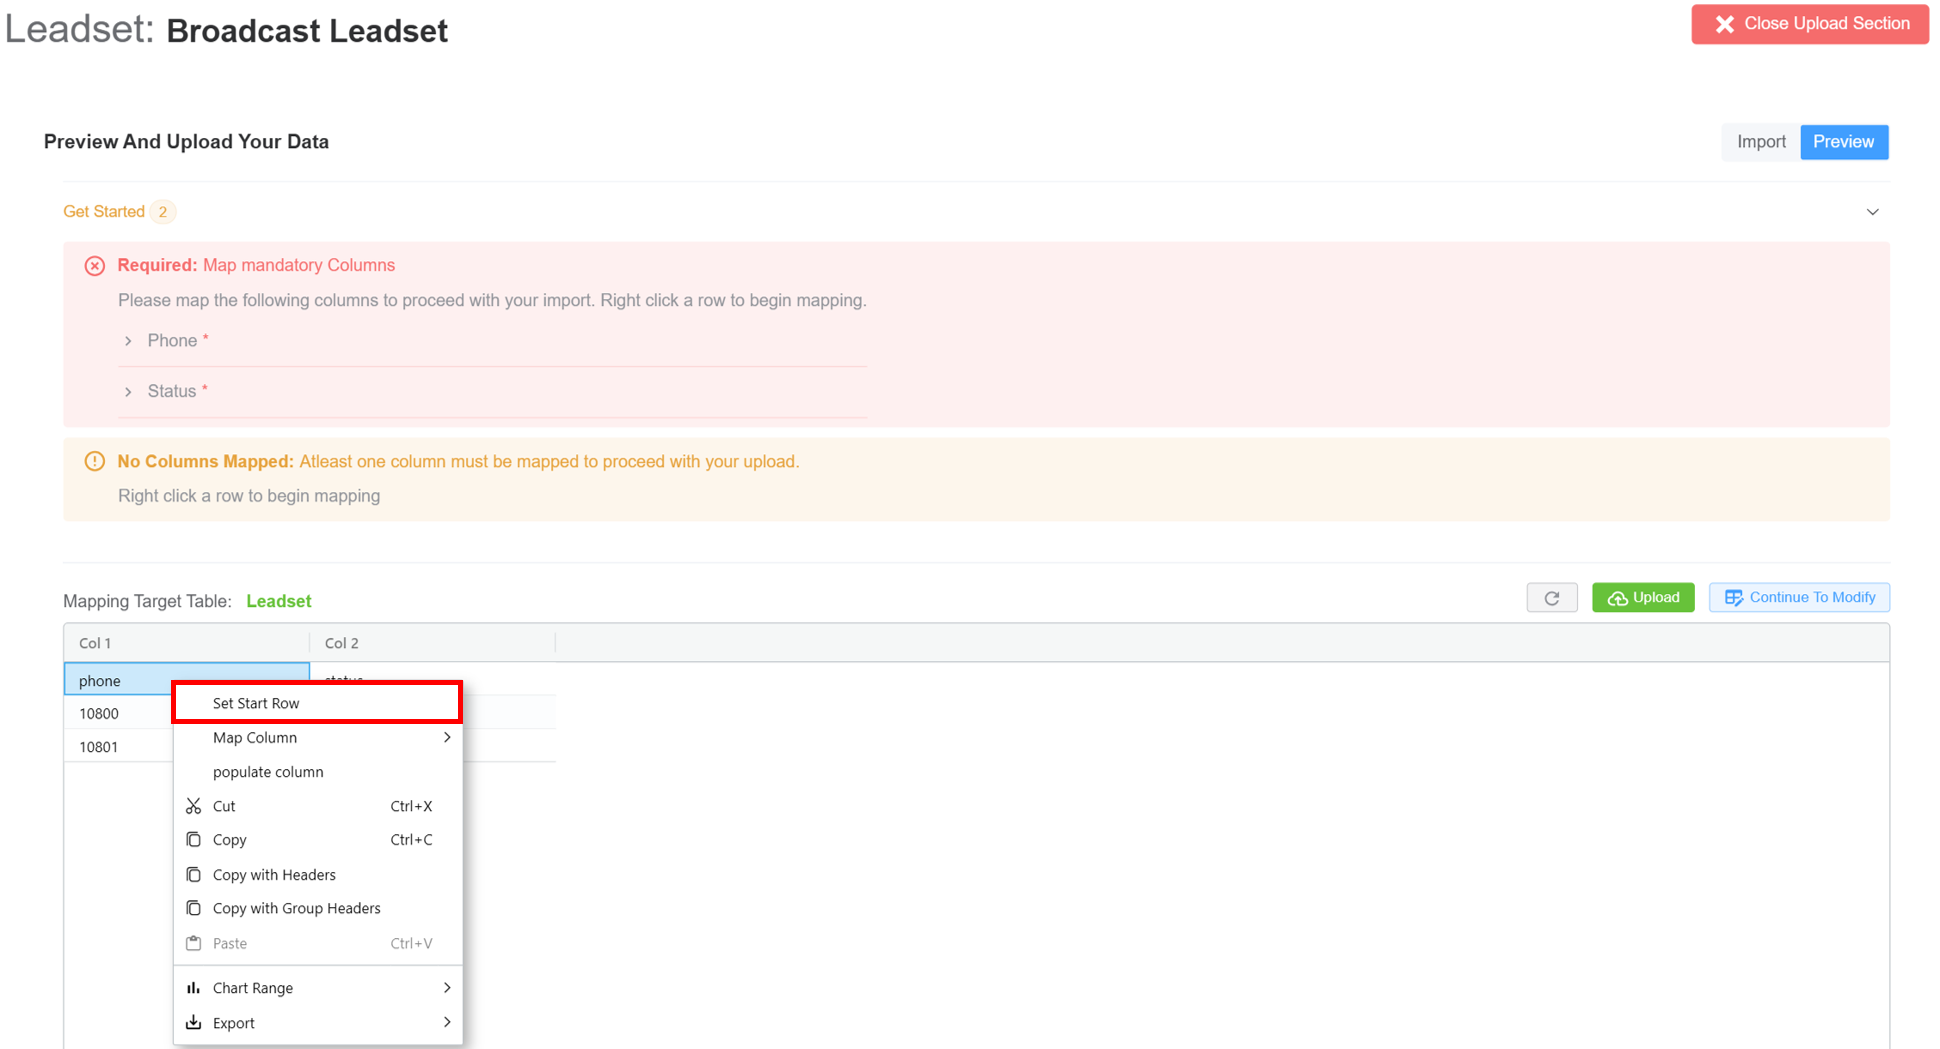
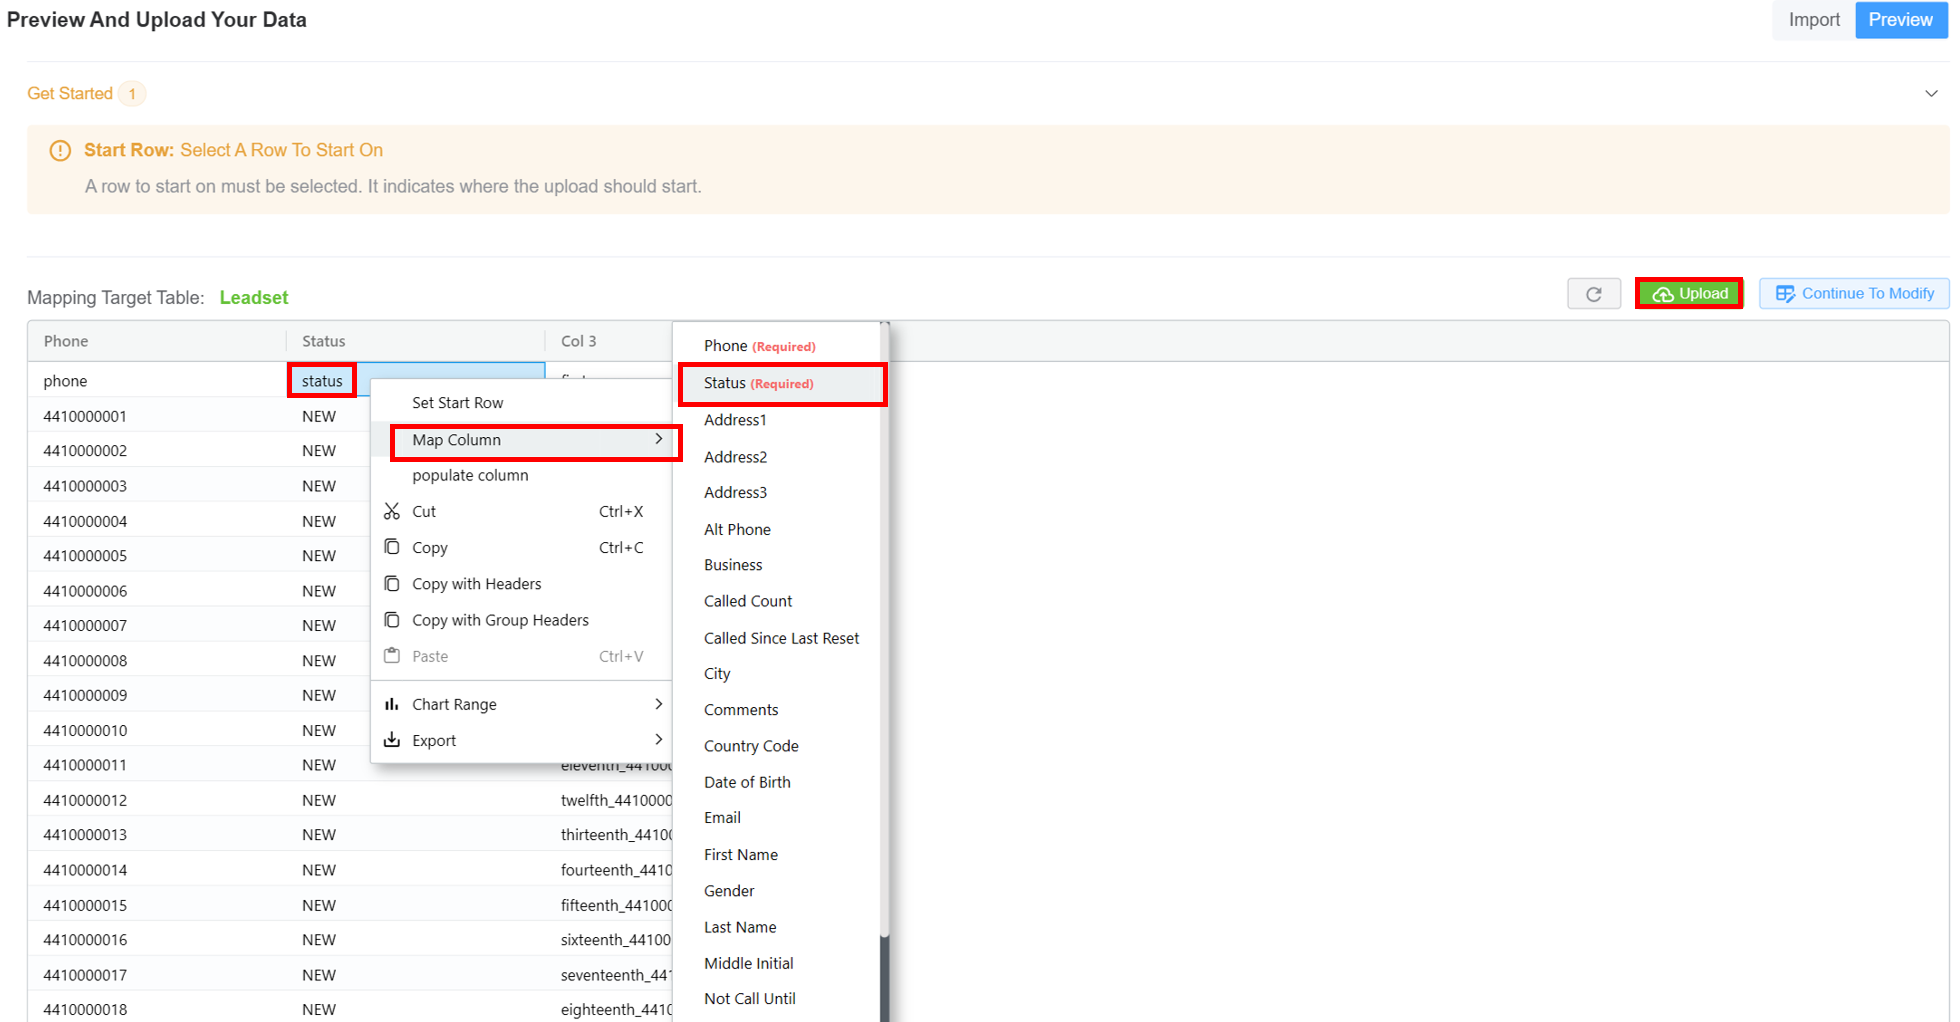
Map Table Columns: Refers to the process of aligning or linking columns from one table to another, ensuring data consistency and accurate integration. This is essential when importing, migrating, or syncing data between different databases or systems.Right-clickon the column you wish to be mapped, click onMap ColumnthenPhone(required field) andStatus(required field). Click onUpload. This will upload the leadset data to the server.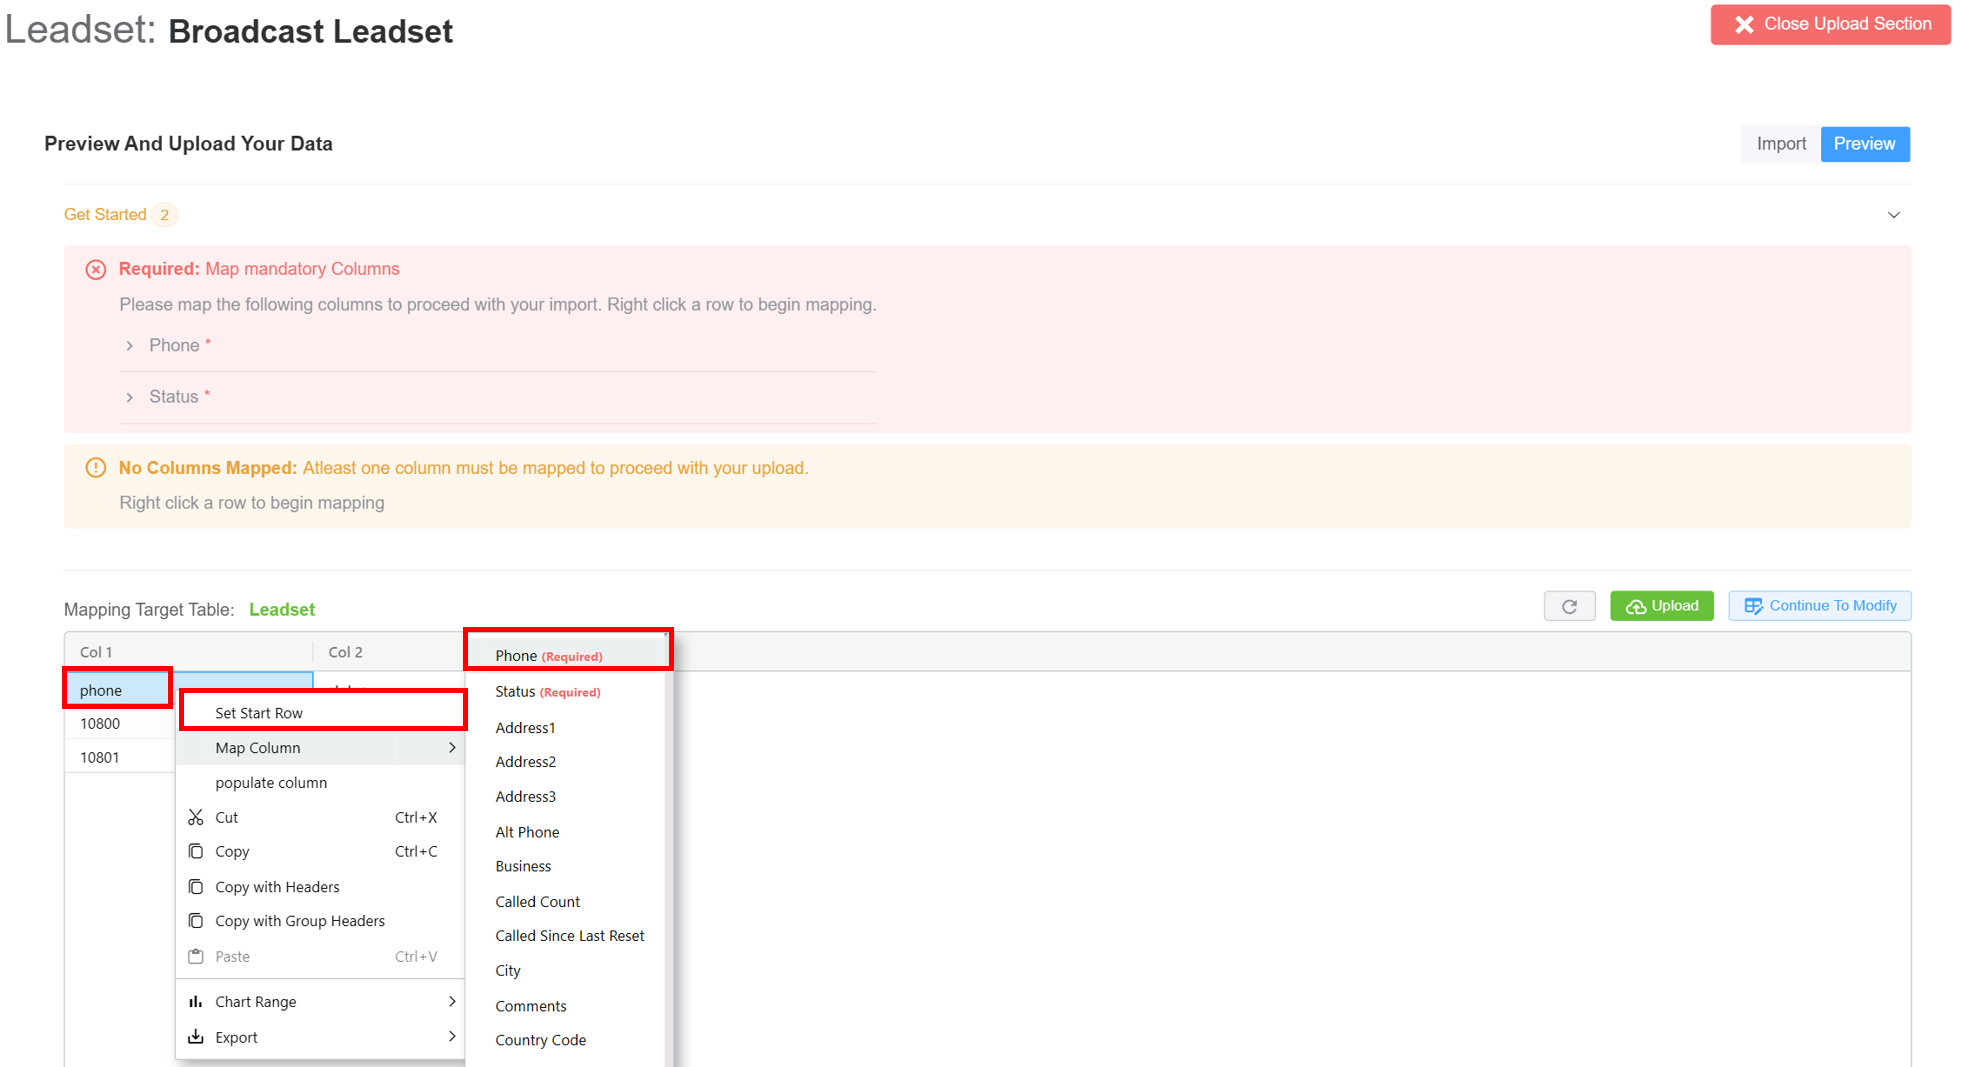
- The leadset gets uploaded successfully.
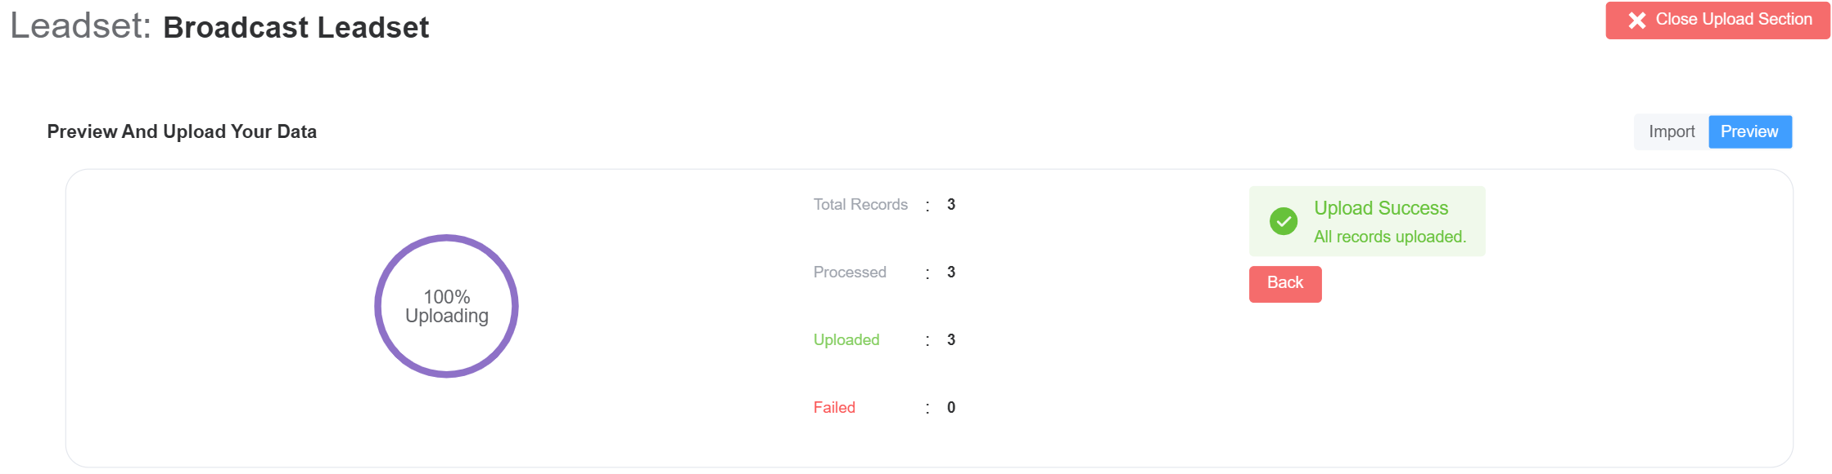
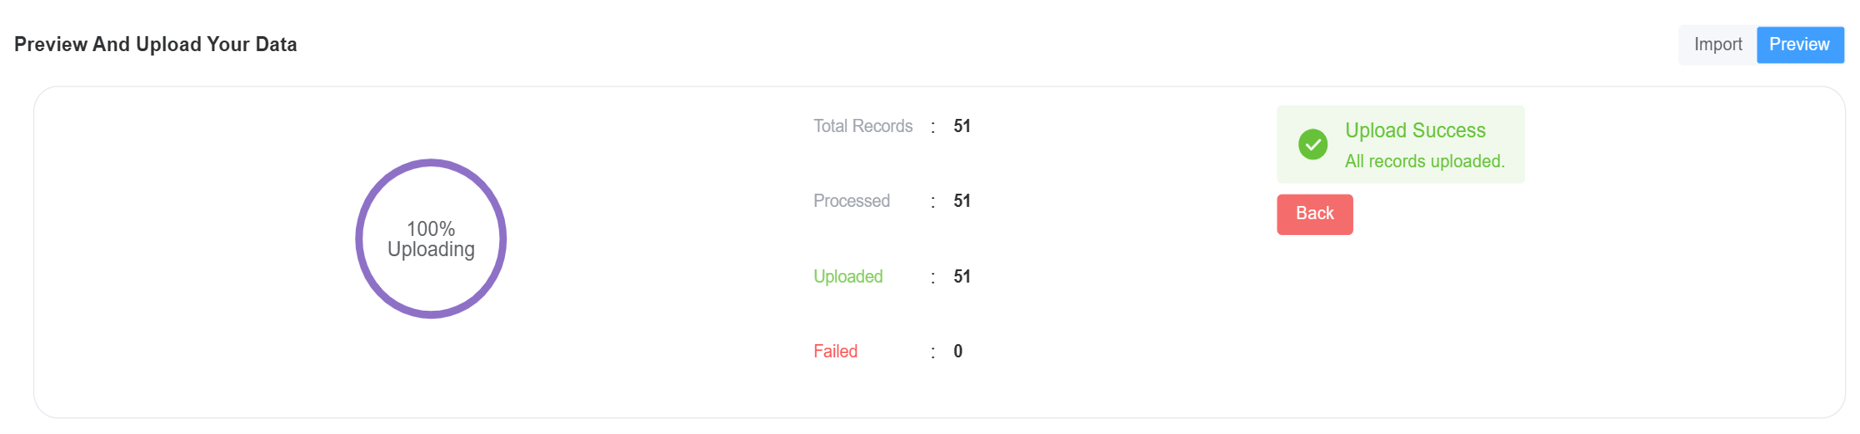
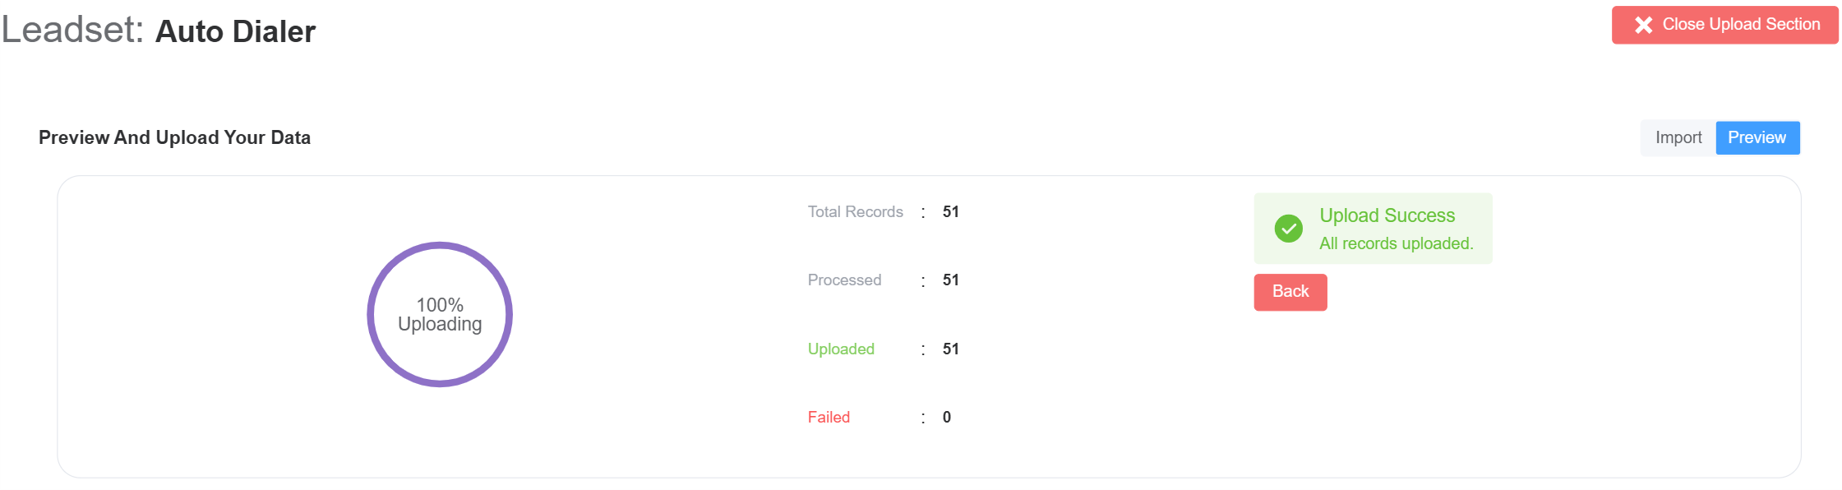
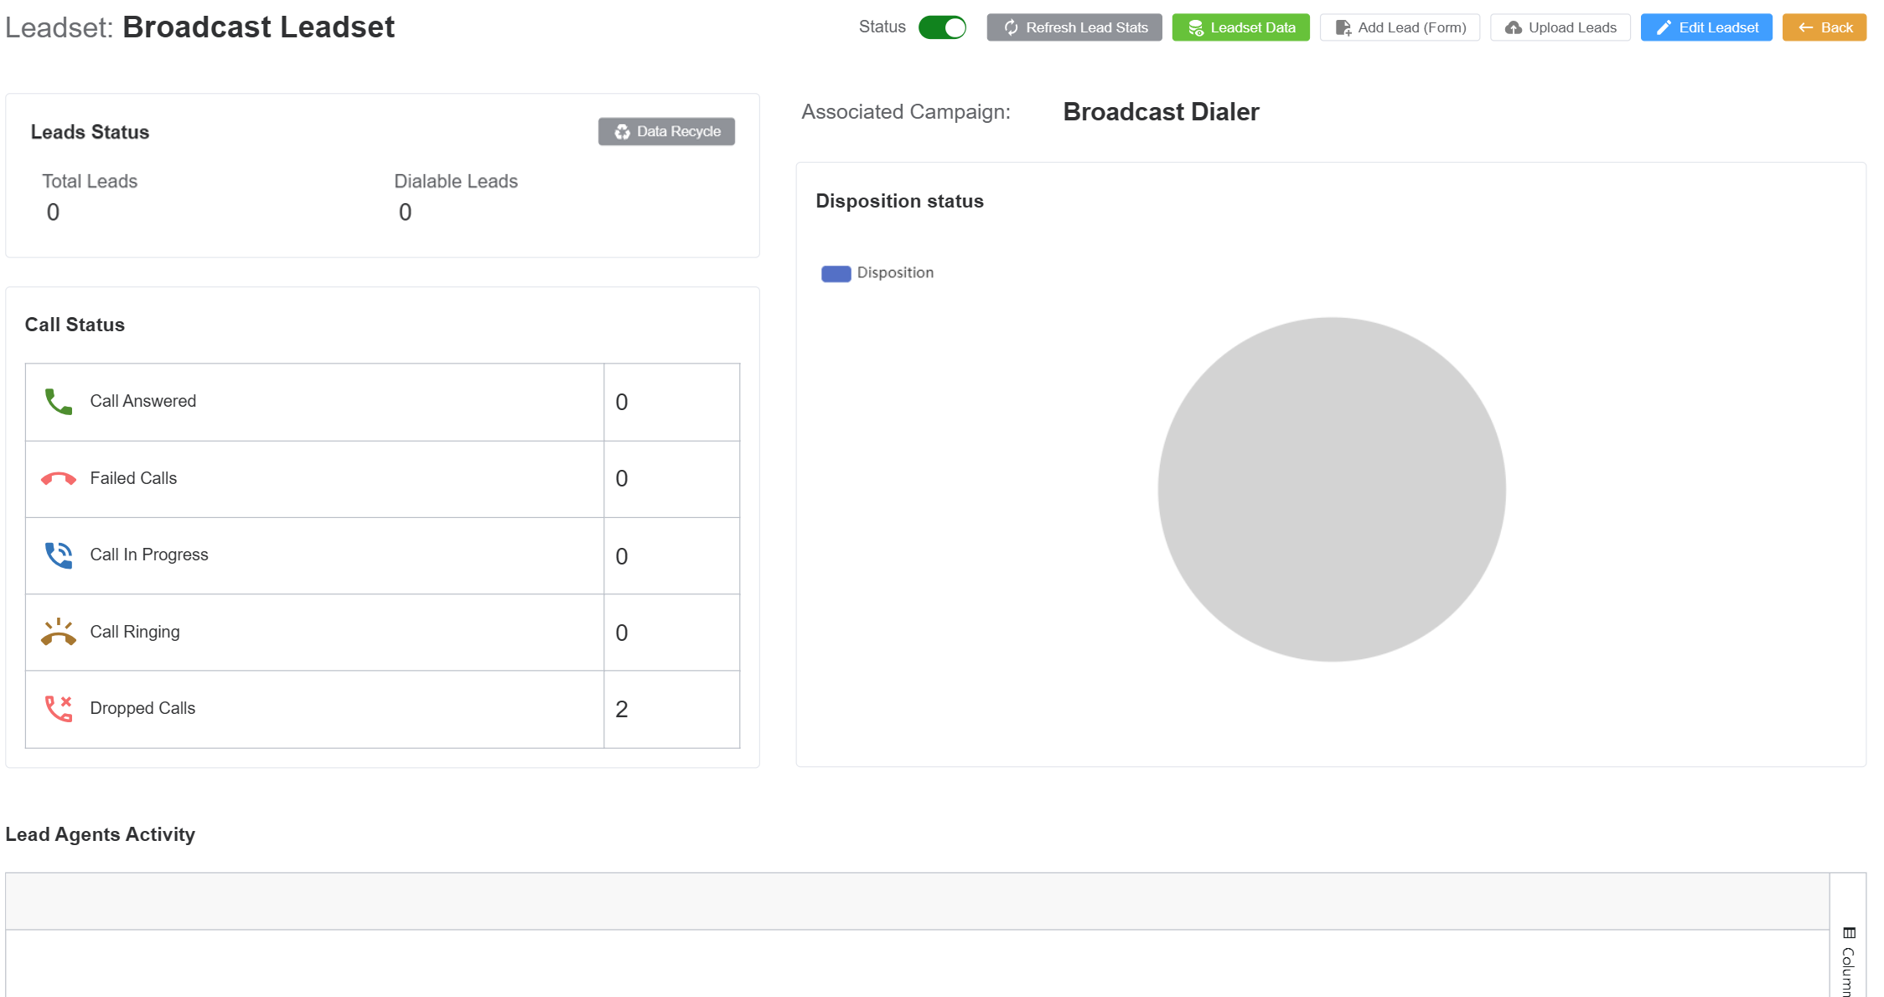
- The leadset dashboard now displays total uploaded leads and dialable leads as well.
- Continue to Modify: If you click here, it will redirect to the Data Suite. Click here to know more.
- Edit Leadset: Modify the details of an existing Leadset. The system will present the same interface as
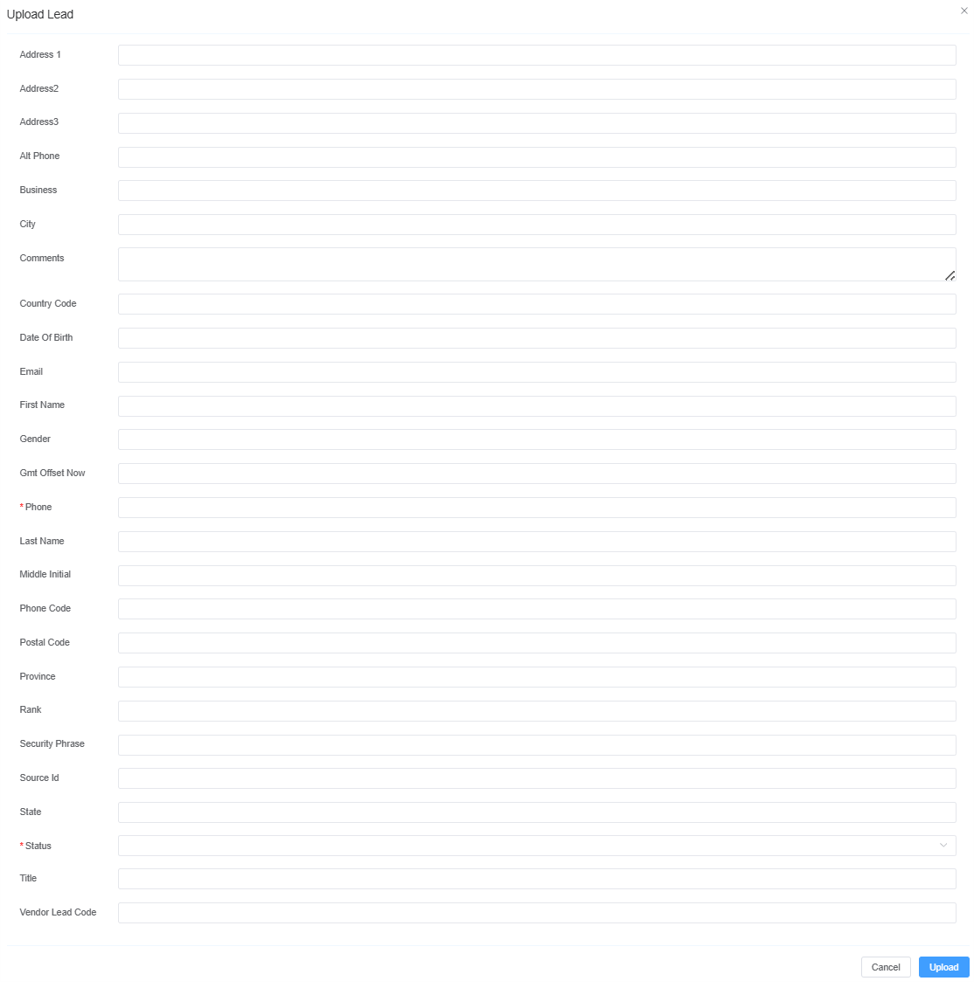
Create Leadset. - Add Lead (Form): Manually add a lead via a form.
-
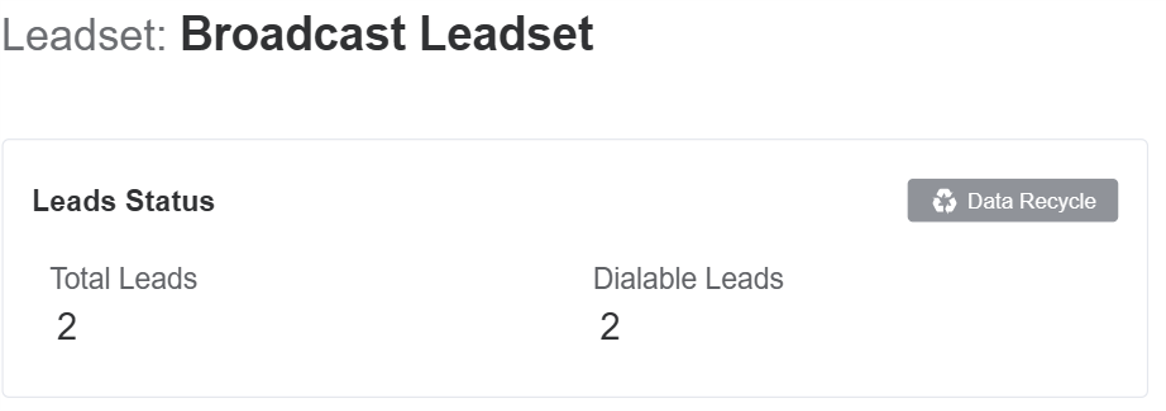
Lead Status: Displays whether a lead is available, being worked on, needs follow-up, or is no longer active
Total Leads: The total number of leads uploaded or assigned to the campaign or leadset.Dialable Leads: Leads that are ready to be called (i.e., they're active, have valid numbers, and meet campaign rules).Data Recycle: Recycles leads that didn’t connect (e.g., no answer, busy) by returning them to the dial queue and updating their status based on retry rules.
-
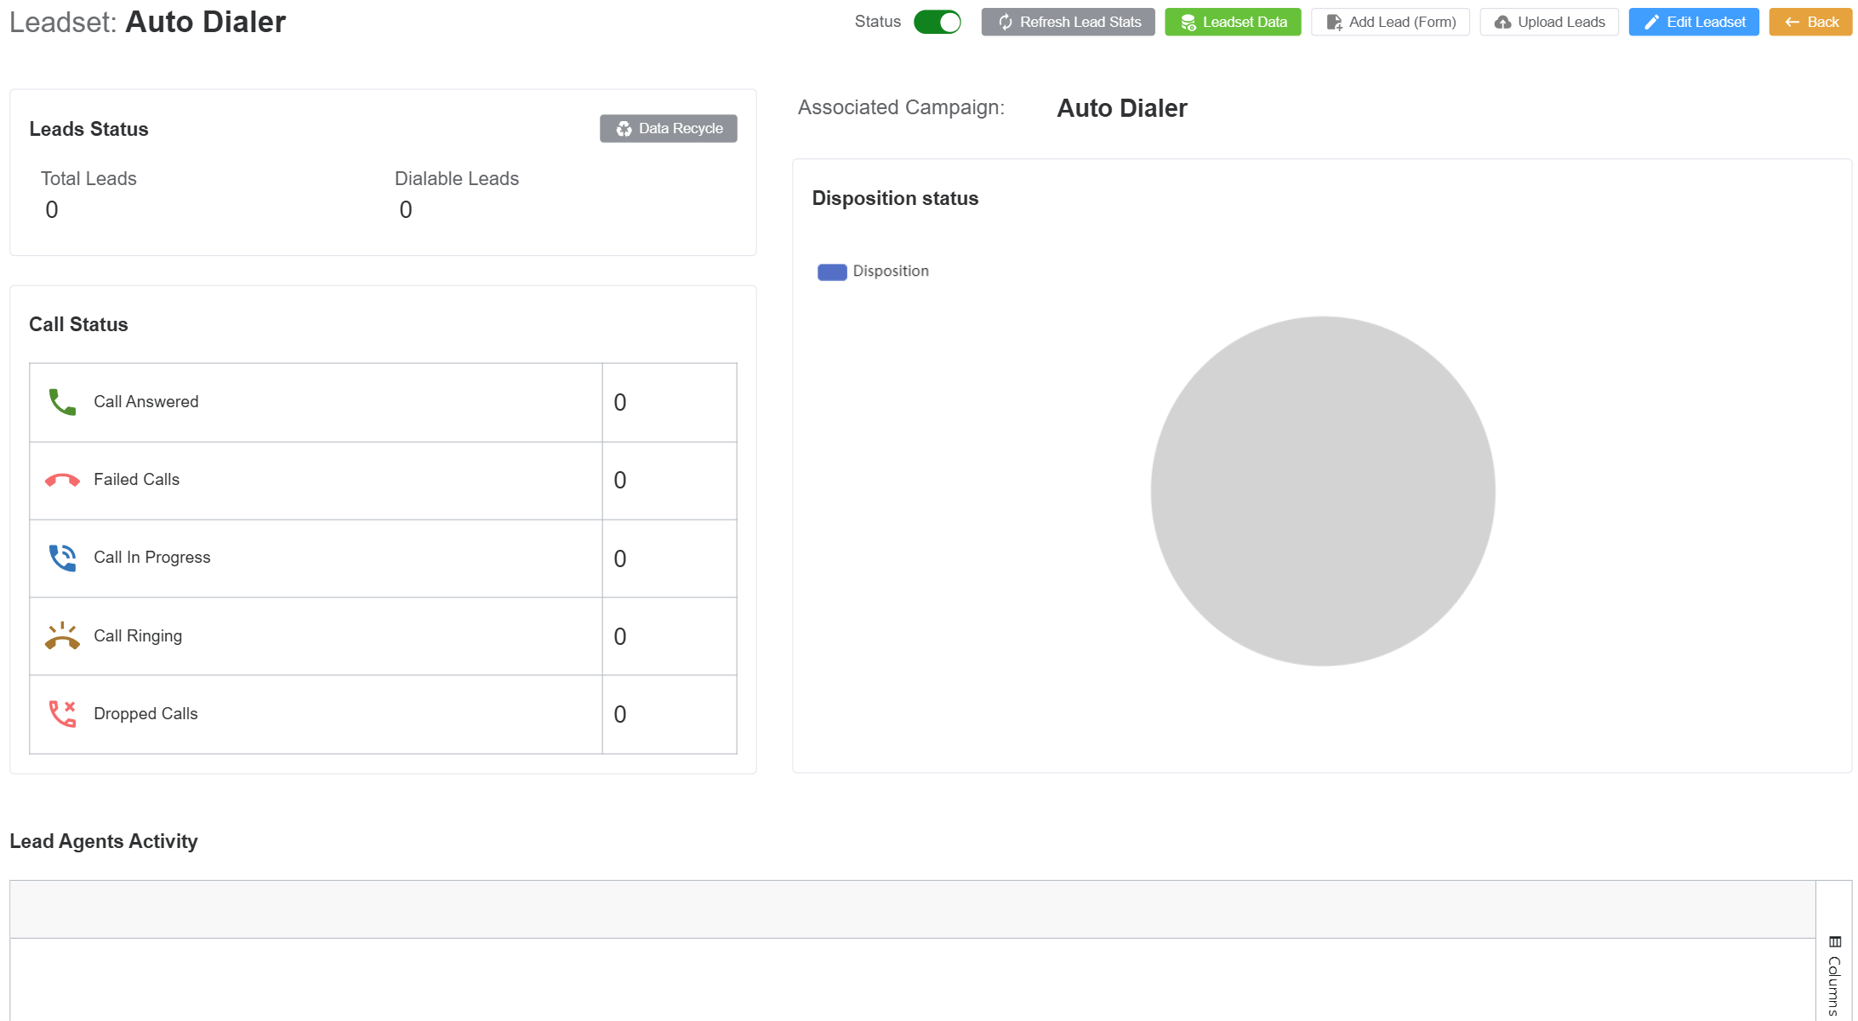
Call Status: Displays counts for different call outcomes; like
Call Answered,Failed Calls,Call In Progress,Call Ringing,Dropped Calls. -
Disposition Status: Shows a pie chart for all the call disposition outcomes. Each colored section of the pie chart corresponds to one of these dispositions.
-
Lead Agents Activity: It displays performance stats of individual agents. The metrics include
Call Transfered,Busy,Call Back,Do Not Call,Not interested,Null,Sale made,Wrong detailsetc.
This section is only valid for Broadcast Dialer
With your Campaign, Agents, Agent Script, and Leadset configured, the next step is to access the Agent Dialer to start placing calls.
Disposition in Broadcast Dialer
As in the Broadcast Dialer the AI Agent can't set the Disposition Status. You need to do the following in order to add the capability for adding the disposition status.
While creating your AI Agent you need to the following things:
1. In the Advanced tab select Set Variable in the Built-in Function field.
2. In the Model tab in the Prompt field you need to give a prompt which says that the status should be saved in the variable; using the functions: name=status and value=[status]
Example Prompt
Your first task is to ask the status: "What's your status?", as you don't currently know the status.
Once the status has been provided, store it in the variable name. Don't store the variable unless you have been given it by the customer. don't save anything until the customer gives you instructions.
Don't proceed with anything else until you have successfully collected and stored the status by calling the setVariable function with name=status and value=[status].
Uploading via URL
- Enter the URL in the CSV format and hit the Upload button.


- Follow the same process as described in the Upload via File section, starting from Step 2 through to the final step.
Uploading via Text
-
Enter the text in the following format:
Column 1,Column 2, Phone, Status 10800, New 10801, New -
Click on
Upload.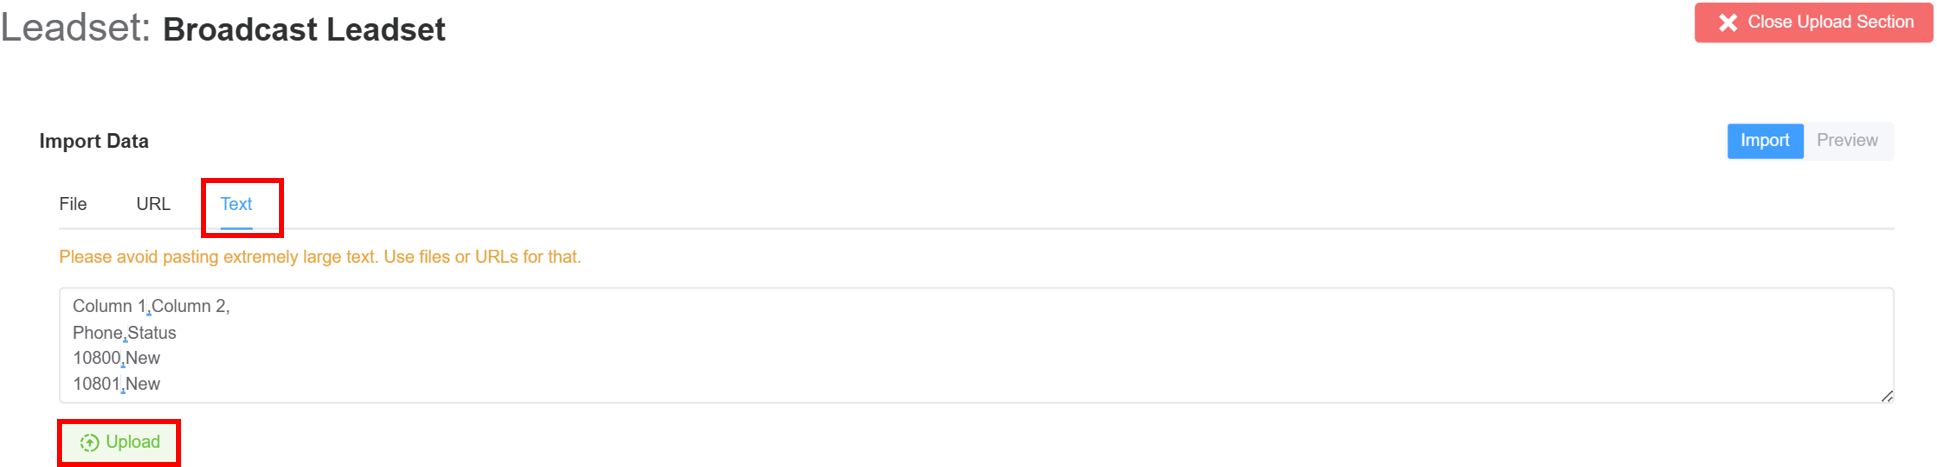
-
Follow the same process as described in the Upload via File/Upload via URL section, starting from Step 2 through to the final step.
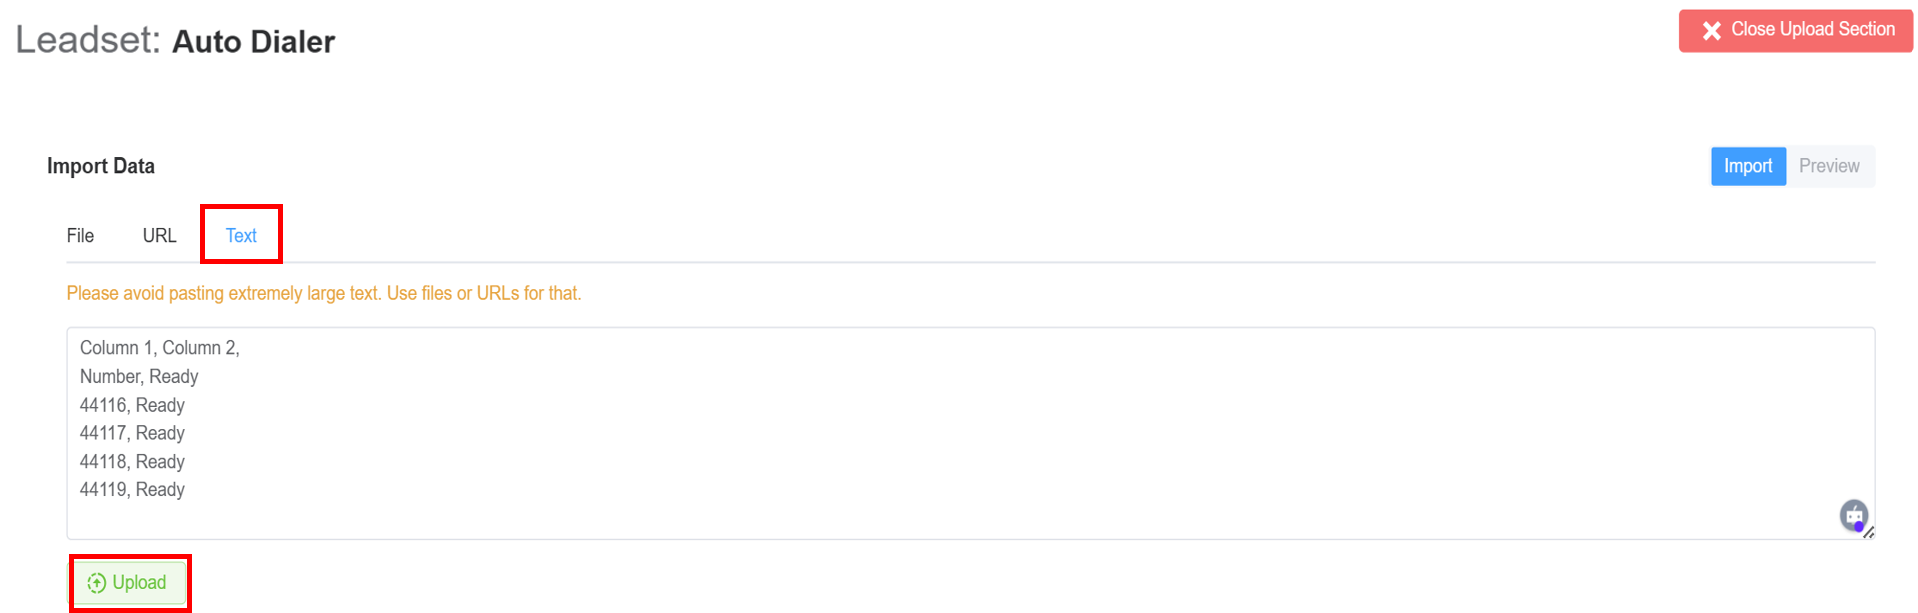
-
Enter the text in the following format:
Column 1,Column 2, Phone, Status 44116, Ready 44117, Ready 44118, Ready 44119, Ready -
Click on
Upload.
-
Follow the same process as described in the Upload via File/Upload via URL section, starting from Step 2 through to the final step.