Setting Up Your Dialer
Overview
In this section, we will walk through configuring the dialers. These are only the general settings required to set up the dialing process for campaigns.
Steps for setting up various Dialers
Step 1 is applicable only for Broadcast Dialer. For Preview and Auto Dialer, please start from Step 2.
- Click here to create an AI Agent.
- Navigate to Customer Portal Contact Center.
- In the
Campaigntab, clickAdd Campaign.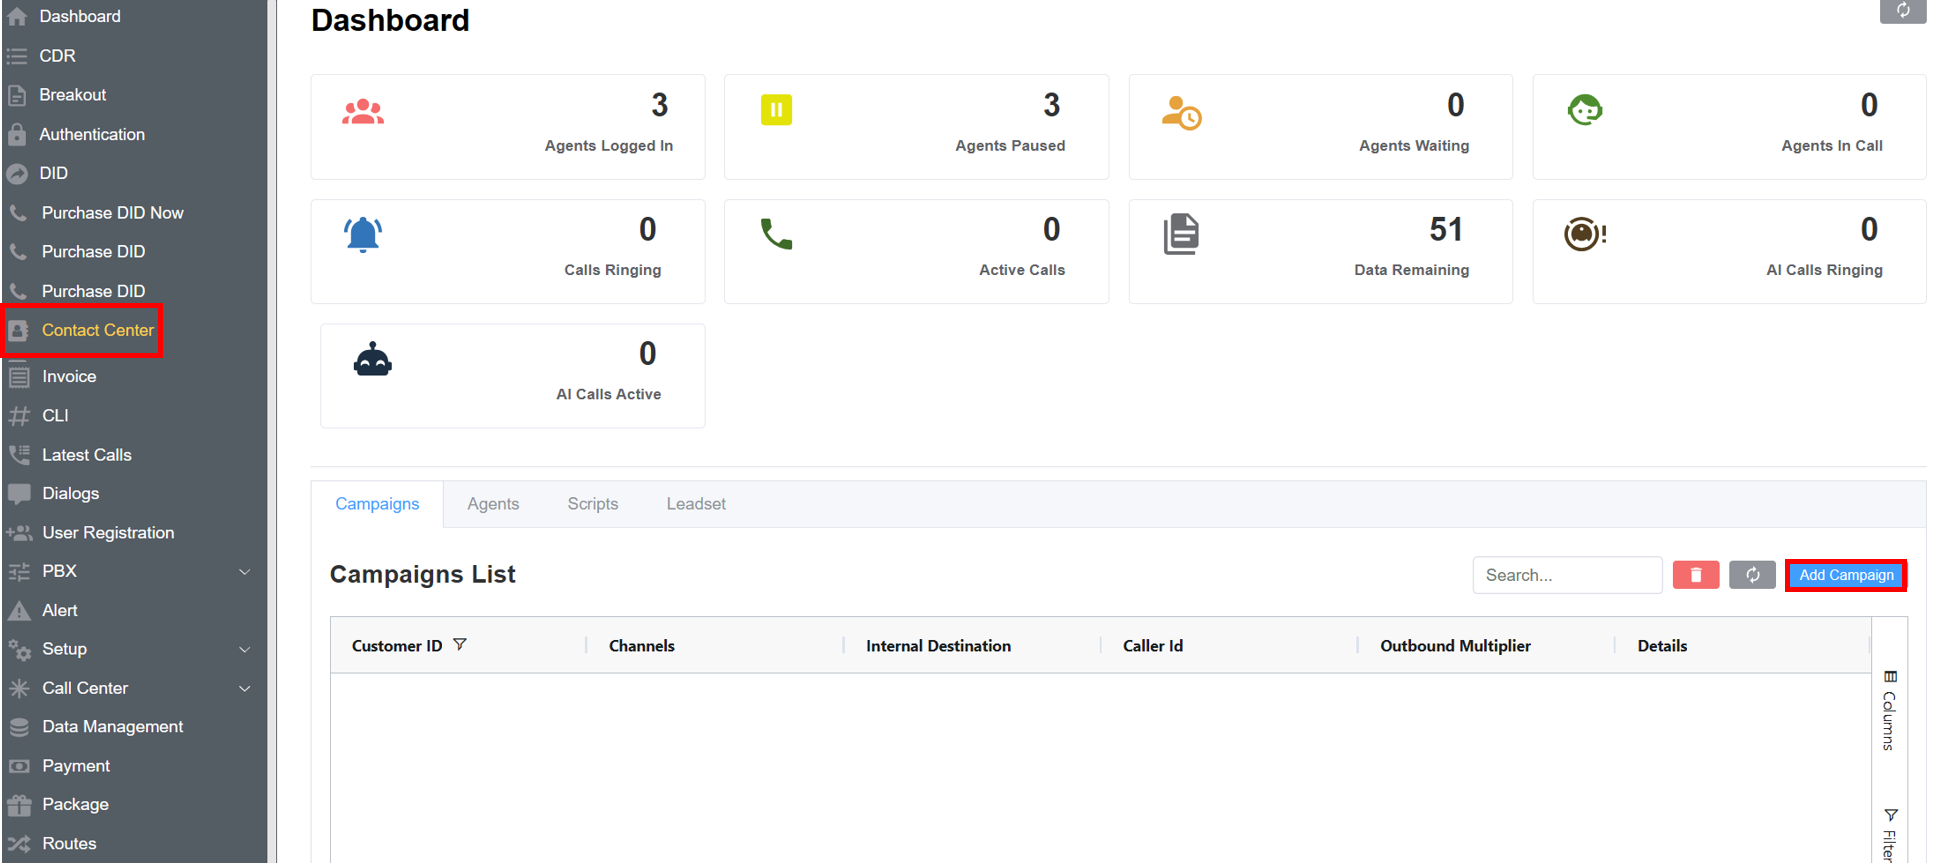
-
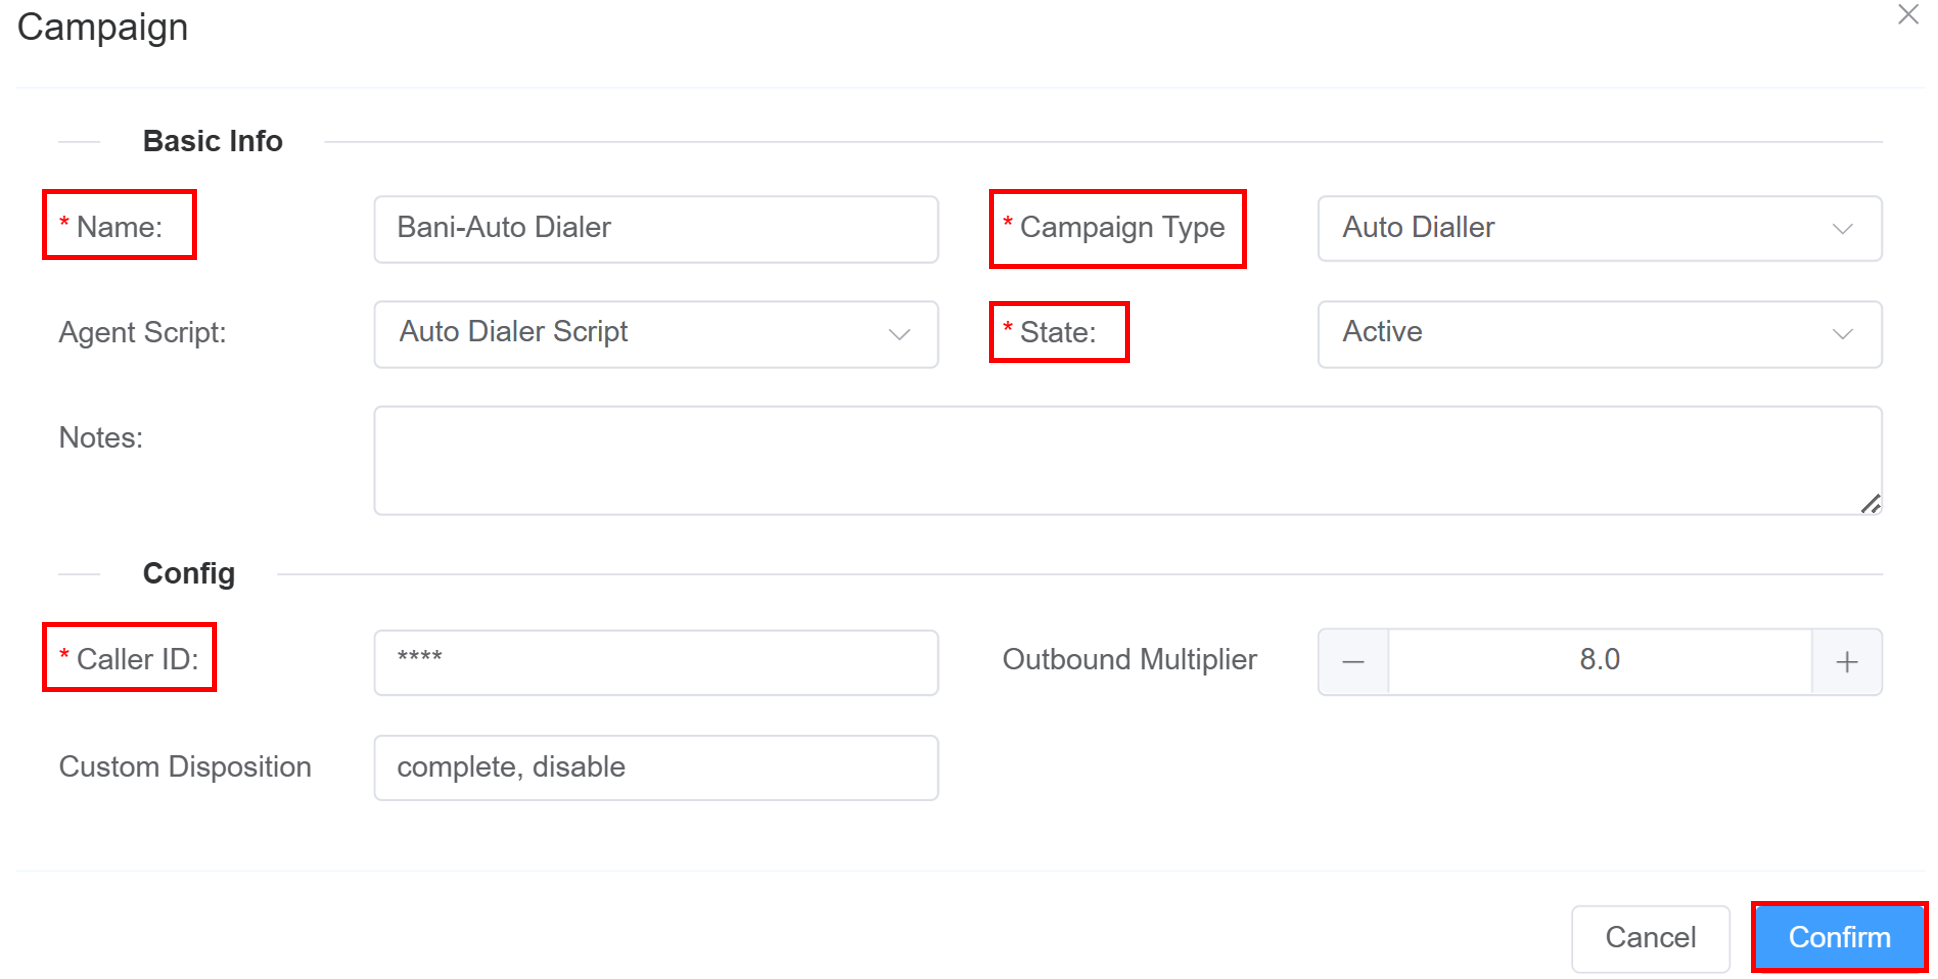
A Window will pop-up with two sections:
- Basic Info:
- Name: Enter the Campaign name.
- Campaign Type: From the drop-down select
Auto Dialer/Preiew Dialer/Broadcast. - Agent Script: Select a pre-configured script for agents to deliver during customer interactions.
- State: Configure the campaign's operational status by setting it to either
Active(currently available for use) orInactive(disabled or paused). - Notes: An optional field to pen down any important information.
-
Config:
- Caller ID: The
CLIused for this campaign. - Channels (Only for Boradcast Dialer): Number of calls to initiate concurrently.
- Source Status: Select
Ready/Newor Custom Source Status for call origination. If no status is selected the calls won't be sent. - Outbound Multiplier (Only for Auto Dialer): It controls how many outbound calls your system (or agent/reseller) can make at the same time.
-
Custom Disposition (Only for Auto/Preview Dialer): A user-defined set of call outcome labels that agents are required to select after each call, enabling structured tracking, systematic reporting, and optimized follow-up workflows.
Agent Unavailable: Call was made but hung up due to agent being busy (mostly in auto dialers).Answered: Call is connected.Connection Error: Originate method failed to work.Error: An error occurred at the code level.Connected: AI call was answered, but disposition wasn't saved.Rejected: Call ended without pickup (user or server may have hung up).Ringing: AI-initiated call is ringing.In Progress: Call data is being allocated.
-
Flags (Only in Preview Dialer): Select
Transferflag to activate the option of call transfer in Preview Dialer. -
Internal Destination (Only in Broadcast Dialer): Select your AI Agent from the drop-down menu.
-
Agents (Only in Preview/Auto Dialer): Select agents for the Auto/Preview Dialer.


- Caller ID: The
- Basic Info:
-
Click on the
Confirmbutton.
Custom Disposition Information
DO NOT CALL, NOT INTERESTED, SALE MADE, CALL TRANSFERRED, BUSY, CALL BACK, DISCONNECTED NUMBER, DECLINED SALE, WRONG DETAILS — Predefined Disposition Statuses.
Users can create custom source statuses and dispositions while creating or updating campaigns.